
Chicken Coop Building
Chicken Coop Building
I have been raising laying hens on our little patch of U.S. soil for more than three decades. I have built coops out of scrap boards, shiny new lumber, and once even out of an old horse trailer my wife swore was ready for the junkyard. If you want a straight-talking, boots-on-the-ground guide to chicken coop building, pull up a bale of straw and stay a while.
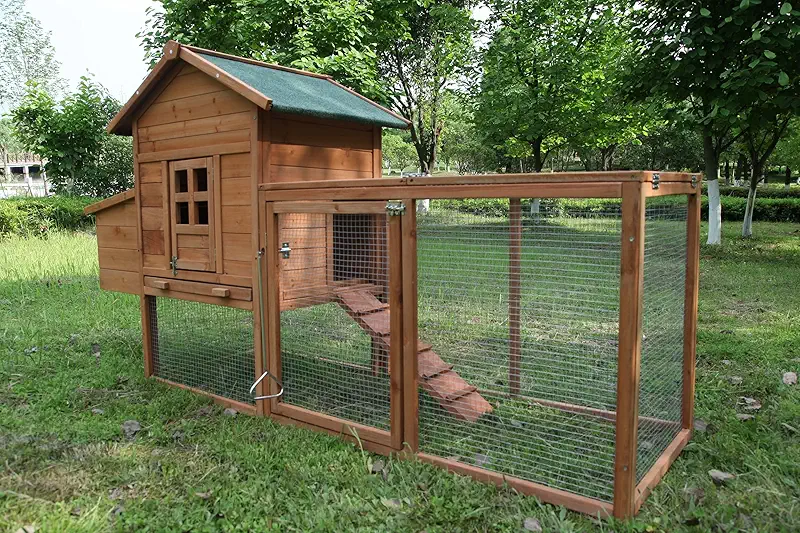
My goal here is simple: help you build (or pick out) a chicken coop that keeps your hens safe, dry, and laying steady, without wasting money or losing sleep every time the wind starts howling. I will share what actually works on a real farm, the little “I wish I had known that sooner” lessons, and a few stories that might make you smile while the hens cluck in the background.
What Makes a Good Chicken Coop, Really?
Folks get excited about chicken coop building and sometimes focus on the fancy stuff first. Cute trim, pretty paint, and tiny barn windows are all nice, but your hens do not care. What they care about is comfort and safety. Over the years I have learned there are five things that truly matter:
- Solid protection from predators, big and small
- Dry floor and dry roof, even in sideways rain
- Fresh air without drafts on the roosts
- Enough room so hens are not bumping shoulders all day
- Layout that is easy to clean when you are tired and it is cold
The prettiest coop I ever built turned into a headache. It had cute shutters, a little porch, and my neighbor joked I should move in myself. Problem was, I got the ventilation wrong. Moist air from the hens built up under the roof, everything stayed damp, and my birds started coughing. Took me a month to admit my mistake and cut in more vents up high. Lesson learned: always build for the birds first, your eyes second.
How Much Space Do Your Hens Need?
When it comes to space, chickens are like people at a family picnic. A little bumping elbows is fine, but pack everyone too tight and somebody will start pecking. For laying hens, these simple numbers work well for backyard flocks:
- Inside the coop: about 4 square feet per hen
- Outdoor run: 8–10 square feet per hen, more if you can spare it
- Roosting space: 8–10 inches of perch per hen
- Nesting boxes: 1 box for every 3–4 hens
I once tried squeezing 12 hens into a space better suited for 8. For a few weeks it looked fine. Then I noticed bare backs, pecked tails, and one bossy hen acting like she owned the whole zip code. When I added an extension to the coop and more perch space, the fighting slowed down and the feathers grew back. Peace and eggs returned.
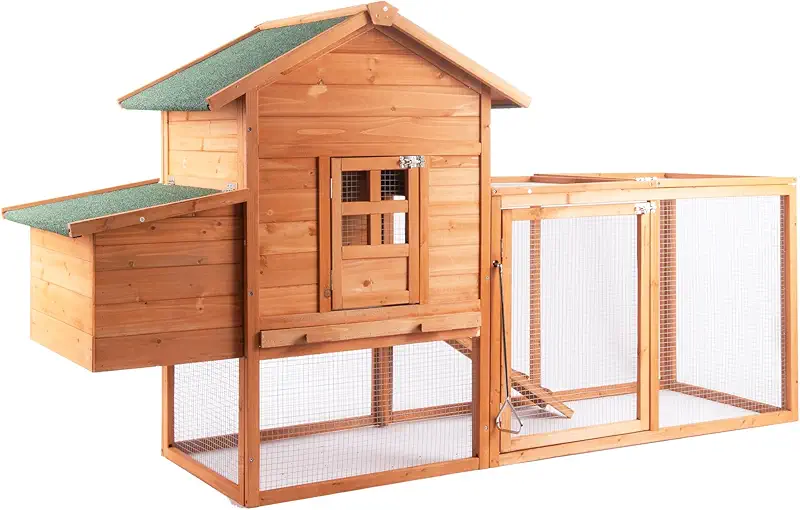
If you are torn between two sizes while planning your chicken coop building project, choose the bigger one if you can. I have never heard a farmer say, “Boy, I wish I had built that coop smaller.”
Picking the Right Spot for Your Coop
Before you swing a hammer or click on any ready-made coop, think about where it will sit. A good spot can make life easy. A bad one will have you cursing every rainy day.
Look for High, Dry Ground
A coop on low ground will turn into a muddy mess after a storm. Hens hate wet feet as much as the rest of us. On my place, the first coop sat at the bottom of a gentle slope, which looked harmless when the sun was shining. Then came spring. Water ran right under the walls. I had to haul in load after load of gravel just to keep the floor dry.
If you can, put your coop on a little rise where rain can drain away. A few concrete blocks, treated skids, or a simple raised frame can also help keep the wooden floor off the damp ground.
Sun, Shade, and Wind
Hens like morning sunshine. It dries things out and tells them it is time to start the day. If you can face the coop toward the east or southeast, your birds will get nice early light while being sheltered from the harshest winds.
On summer afternoons, some shade is your friend. I built one coop under a big old maple. In July, those hens were cooler than I was. In winter, I prefer the coop out from under heavy limbs so snow and ice are not dropping on the roof. A row of shrubs or a fence can break the wind without blocking the sun.

Also, think about how far you want to walk in February. That perfect scenic spot 300 yards from the house feels a lot less perfect when you are carrying water in the dark with snow up to your shins.
Ventilation: Fresh Air Without Chilling Your Birds
If I could step into every beginner’s coop during the first winter, I bet I would find the same thing: not enough ventilation. People worry their hens will get cold, so they seal the coop tight. Then the moisture from their breath and droppings builds up, and you start seeing frostbit combs and sick birds.
Chickens handle dry cold better than damp cold. The trick is to move wet air out while keeping the hens out of drafts.
Simple Rules for Coop Ventilation
- Put most vents up high, above the hens’ heads on the roost
- Use hardware cloth (not window screen) over every opening
- Have vents on at least two sides to let air flow through
- Add shutters or flaps so you can cut some airflow on harsh nights
In one of my early builds, I added two little vents near the roof and thought I was clever. By December, the inside of the coop smelled like a bus station. I doubled the vent area and ran a narrow ridge vent the length of the roof. The smell eased up, the walls dried out, and my birds looked brighter.

When in doubt, add a bit more ventilation high up. Just avoid big gaps at roost height, or you will have cold, grumpy hens staring at you like you stole their corn.
Building Strong: Predators Do Not Mess Around
Out here, everything loves chicken dinner. Raccoons, foxes, neighborhood dogs, coyotes, hawks, owls, weasels, even rats if you let the feed spill. Chicken coop building is really about building a fortress that still feels like home to your birds.
Hardware Cloth, Not Chicken Wire
Let me say this plain: chicken wire keeps chickens in; it does not keep predators out. A determined raccoon can tear right through it. Use 1/2 inch hardware cloth for the lower part of the run, the windows, and any vent openings.
- Windows and vents: cover with hardware cloth, screwed down, not just stapled
- Lower 2–3 feet of run: hardware cloth, not chicken wire
- Digging predators: bury a skirt of hardware cloth 12–18 inches out from the walls, just under the soil
After I lost a couple of good laying hens to a clever raccoon, I stopped cutting corners. I went back and replaced every bit of chicken wire within paw reach. Have not lost a hen to a raccoon since, and that was many years and many batches of chicks ago.

Doors, Latches, and Nighttime Routine
Use solid doors with sturdy frames. Gaps big enough to slide two fingers into are big enough for trouble. For latches, I prefer something a raccoon cannot easily fiddle open, like a carabiner clip or a two-step latch.
My nightly routine is simple: count hens, close pop door, check latches. Takes two minutes and has saved me a lot of heartache. A solid door, closed every evening, is worth more than any pretty trim board on the coop.
Making Life Easy: Layout, Cleaning, and Eggs
A coop that is hard to clean will not get cleaned as often as it should, especially when chores pile up. When you plan your chicken coop building project, picture yourself out there on a cold, muddy Thursday, tired from work. What will you wish you had built?
Doors and Access
- Make the main door big enough to walk in without ducking too much
- Add a clean-out door or big opening near floor level if you use deep bedding
- Place roosts so you can reach under them with a rake or shovel
- Put nest boxes at a comfortable height for gathering eggs
My favorite coop has a waist-high row of nest boxes that open from the outside with a simple lid. I can gather eggs in my slippers if I want, without stepping into the coop at all. On icy mornings, that little bit of convenience feels like a luxury vacation.

Flooring and Bedding
I have tried dirt floors, plywood, and concrete. They all can work if you manage moisture and cleaning.
- Dirt: cheap, but needs good drainage and more predator protection
- Wood: easy to build, but keep it dry and consider a coat of sealant or a sheet of linoleum
- Concrete: durable, easy to clean, but feels colder; deep bedding helps
For bedding, I mostly use dry pine shavings or straw. In winter, I often use the deep litter method: adding fresh bedding on top and turning it now and then. It warms up slightly as it composts. Smells a lot better than my teenage son’s room, I will tell you that.
Ready-Made Coops vs. Building From Scratch
Not everyone wants to spend weekends with a saw and a tape measure, and that is all right. You have two main paths:
- Build your own coop from lumber or plans
- Use a ready-made chicken coop kit or pre-built model
Reasons to Build Your Own
- You can match the coop exactly to your flock size and yard
- Stronger framing and heavier materials if you choose
- Easier to add on later when chicken math hits and you “need just a few more hens”
My first homemade coop looked a little crooked from the back side, but the birds never complained. Over the years I added a wing here, a shade panel there, and now it looks like a chicken village. The flexibility is worth a lot.
When a Ready-Made Coop Makes Sense
Still, there are times when a ready-made coop is a blessing:
- You are short on time or tools
- You only want a small backyard flock
- You prefer something you can assemble in an afternoon
I helped my niece assemble a pre-made coop behind her suburban home. We put it together with a cordless drill, a stubborn screw or two, and a lot of laughing. For her first four hens, it was just about perfect.

If you decide you would rather start with a ready-made coop than cut and nail every board yourself, there are plenty of solid options that follow the same good principles we have been talking about: dry floor, safe walls, proper space, and easy cleaning.
Let me browseLittle Details That Make Hens Happy
Once you have the basics down, a few small touches can turn a simple coop into a real hen paradise.
- Stable roosts: use 2x4 boards laid flat so hens can cover their toes in winter
- Good light: at least one window for natural daylight
- Dust bath area: a box or corner with dry soil, sand, or wood ash
- Feed and water placement: high enough to keep out bedding, low enough for smaller hens
- Simple ramp: gentle enough that heavy breeds can climb without stumbling

One of my coops has a covered corner filled with dry soil and some sifted wood ash from our stove. On sunny days, the hens line up like they are at the spa, flipping dust over their backs and closing their eyes. Healthy skin, fewer mites, and a flock that looks downright content.
Your birds will spend a big part of their lives in that coop. A little thought now saves you money later on vet bills and lost egg production.
Chicken Coop Building – Common Questions
How big should a chicken coop be for 6 hens?
For 6 laying hens, I like at least 24 square feet inside the coop, plus a run of 60 square feet or more. That is a simple 4x6 coop with a 6x10 run as a starting point. If you have bigger breeds like Orpingtons, adding a little extra room will keep everybody calmer and cleaner.
Do I need insulation in my coop?
In most of the U.S., good ventilation and a draft-free coop matter more than insulation. I only insulate if I can cover it fully so the hens cannot peck at it. Many of my coops are just solid wood walls with no insulation. The birds stay warm by roosting together and staying dry. If you live somewhere truly bitter cold, you can insulate but still keep plenty of ventilation up high.
What is the best roof style for chicken coop building?
On my farm, simple beats fancy. I prefer a sloped shed-style roof because it is easy to build, sheds water and snow well, and gives you a tall wall for vents and a short wall for nest boxes. A traditional gable roof works fine too. Whatever style you choose, focus on a solid overhang to keep rain from blowing in around the door and windows.
How high should roosts and nest boxes be?
I hang roosts about 18–36 inches off the floor, depending on flock size and breed. Heavier birds like closer to 18 inches. Nest boxes sit a bit lower than the roosts so the hens do not try to sleep in them, usually 12–18 inches up. That keeps eggs cleaner and makes it easy on your back when you gather them.
Can I move a chicken coop after it is built?
Sure, but it is easier if you plan for it from the start. I have a couple of coops built on skids that I can pull with my tractor to fresh ground. For a backyard setup, a lighter coop with built-in handles or wheels can work. If your coop is heavy and fixed, you can still rotate the run area by adding temporary fencing and letting the grass recover behind the birds.
Whether you grab your hammer or go with a kit, the goal is the same: a safe, simple, dry place where your hens can scratch, talk, and quietly turn grain into breakfast. If you keep those basics in mind while planning your chicken coop building, you will be in good shape for many seasons of fresh eggs.
See all coops