
Chicken coop drawing
I’ve been raising laying hens on our little patch of ground for more than thirty years, and I’ll tell you this: a good chicken coop starts long before the first board gets cut. It starts with a clear, honest chicken coop drawing that fits your birds, your land, and your everyday life.
On this page I’ll walk you through how I read, tweak, and trust a chicken coop drawing, so your hens end up safe, dry, and laying like champs.
A coop drawing may look like a bunch of lines and numbers, but for a farmer it’s a promise: the promise that your birds will be warm in January, cool in July, and that you won’t be cussing every time you go gather eggs. I’ve built coops that worked like a dream and a few that made me shake my head for years. I’ll share both with you.
Let me see options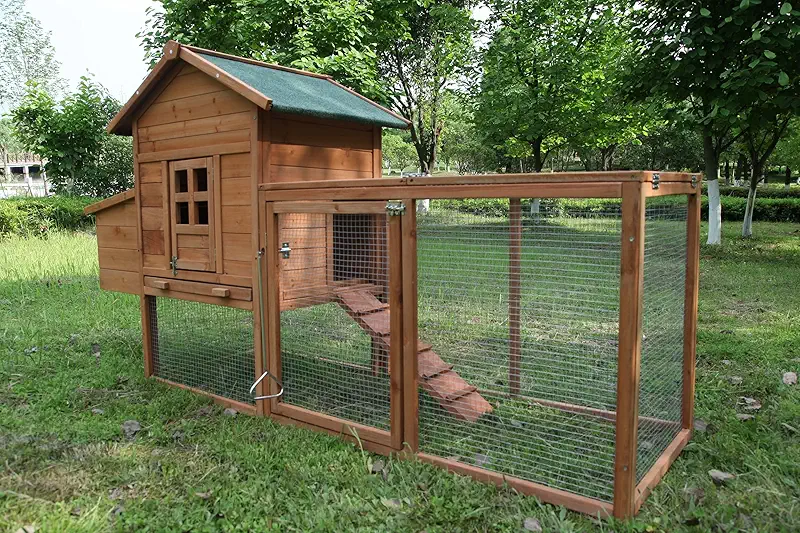
Why a good chicken coop drawing matters more than you think
When I built my first real coop, I sketched it on the back of a feed bag with a dull pencil. No measurements, no real plan, just “big enough” and “looks about right.” The hens forgave me. My back did not.
A proper chicken coop drawing saves you lumber, time, and a lot of muttered words you don’t want your grandkids to repeat. It helps you:
- Give each hen enough room to stay calm and keep laying.
- Place doors, nests, and roosts where they work with you, not against you.
- Plan airflow so the coop doesn’t smell like old socks and swamp water.
- Keep water and feed clean, dry, and out of the way.
- Stop predators while you’re asleep in your bed.
How to read a chicken coop drawing like an old farm hand
Don’t let the lines scare you. A chicken coop drawing is just a bird’s-eye story of where everything goes. I like to walk through the drawing in my mind, step by step, like I’m doing morning chores.
1. Floor plan: imagine your daily routine
Look at the top-down view first. Ask yourself, “Where do my boots walk?” If the plan makes you walk in circles just to reach the nest boxes, something’s wrong on paper and it’ll be even worse in mud and snow.
- Door placement: You want the main human door close to the path you already use, not across the wettest part of the yard.
- Nest boxes: I like them on the side closest to the house. Short walk, quick eggs.
- Feed and water: Put them where you won’t kick them or trip over them, usually near the door but out of the main traffic line.
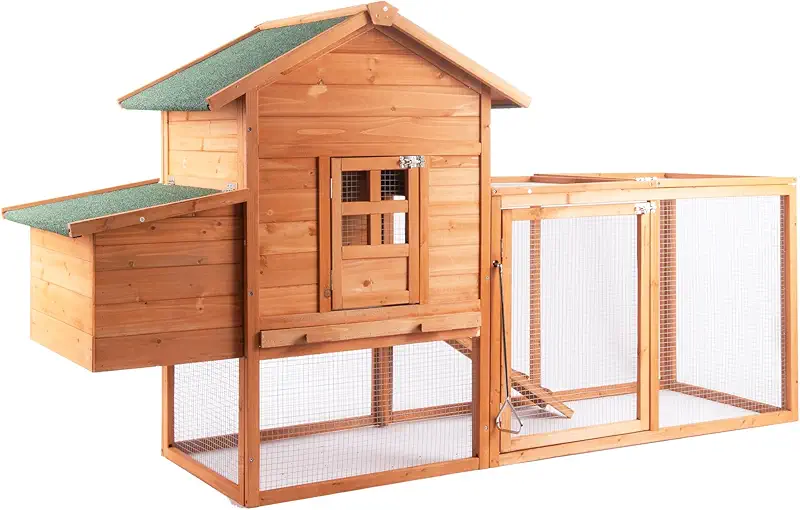
2. Side view: head room and roost height
The side view shows you how tall everything really is. Chickens like to roost up high, but I still like to be able to reach them without needing a ladder and a prayer.
- Roosts a bit higher than nest boxes keep hens from sleeping where they lay.
- Leave enough head room to rake out bedding without bending in half.
- Check the drawing for a clean-out door if you want to shovel straight into a wheelbarrow.
3. Ventilation and windows on the plan
Your chicken coop drawing should show vents and maybe windows. A coop without air is just a fancy box of trouble. Look for high vents that let moisture out without putting your hens in a draft.
Size: what your chicken coop drawing should promise each hen
Over the years I’ve noticed something: crowded hens act a lot like crowded people. They get loud, pick on each other, and stop doing what you want them to do—like laying eggs.
Inside space on paper, calm hens in real life
When you look at the chicken coop drawing, check the measurements and count your birds. I like at least 4 square feet of indoor coop space per hen for standard breeds, more if winters are long and they stay inside.
- Small flock of 4–5 hens: 20 square feet feels generous.
- Medium flock of 8–10 hens: think 40+ square feet.
- Bigger groups: I’d rather build two coops than try to cram everybody into one big circus.
Outdoor run space on your drawing
A run that’s just a skinny alley on the plan will turn into a muddy mess. Look for at least 8–10 square feet of run per hen if they’re not free-ranging. More space keeps the peace and the feathers on.
If your drawing includes a covered section of the run, good. Hens don’t care for rain, and neither do I when I’m out there with them.

Turning a chicken coop drawing into an egg-laying paradise
When the nests and roosts are drawn right, the whole coop just works. When they’re wrong, you end up with eggs on the floor and hens sleeping where they shouldn’t.
Nest boxes on the drawing
I like nest boxes shown clearly on the chicken coop drawing with size and height. For most laying hens, 12 inches wide, 12 inches deep, and about 12 inches tall does the trick.
- One nest for every 3–4 hens is usually enough.
- Nests a bit off the floor keep bedding dry.
- A slight tilt forward and a little lip on the front keeps eggs from rolling out.

Roost bars: higher than the nests, softer than a pipe
On the drawing, look for roost bars running the long way across the coop, not so close to the wall that hens rub their tails raw. I prefer a 2x4 laid flat so their feet stay warm under them in winter.
- Allow about 8–10 inches of roost space per hen.
- Keep roosts on one level, or stepping up like stairs, so the boss hens don’t fight as much.
- Place roosts over a droppings board if the drawing includes one; cleaning becomes almost pleasant. Almost.
Weather, predators, and what your chicken coop drawing should protect against
A chicken coop drawing drawn on a sunny day still has to work in a blizzard, a downpour, and those weird spring weeks where it’s mud on top of ice. And while you’re worrying about weather, raccoons and foxes are worrying about dinner.
Reading the drawing for wind and rain
Check which side the big door and windows face. Around here, our bad weather comes from the west, so I like doors facing south or east. Your drawing should respect the wind that actually blows on your land.
- Look for roof overhangs on the plan; they keep rain off the walls and entry.
- A slight slope on the roof, marked on the drawing, helps snow slide off instead of piling up.
- Gutters, if shown, are not just fancy; they keep the run from turning into a soup bowl.
Predator-proof details on the plan
Your chicken coop drawing should show hardware cloth, not just chicken wire, especially on windows and under the run. Chicken wire keeps chickens in; hardware cloth keeps hungry teeth out.
- Look for notes about burying wire at least 12 inches down to stop digging.
- Doors should show solid latches, not just hooks a raccoon can open with one clever paw.
- Every vent and window opening should have a protective layer drawn in.

Designing for easy chores: the part most drawings forget
I always say: “If the coop isn’t easy to work in, you won’t want to keep chickens for long.” A good chicken coop drawing doesn’t just think about the hens. It thinks about your knees, your back, and the days you’re doing chores in the dark with a flashlight between your teeth.
Doors, paths, and clean-out access
Make sure the drawing shows doors wide enough for you and a wheelbarrow. I learned that the hard way with a pretty little coop that looked great in the picture and made me carry out every shovel of bedding by hand.
- Human door: at least wide enough for your tools and a full bucket.
- Clean-out door: shown low and wide, opening to a spot where a wheelbarrow can reach.
- Chicken pop door: on the drawing, it should lead to dry ground, not the lowest, wettest spot in the yard.

Lighting and electricity on the plan
The drawing may show a light fixture or power outlet location. If you live where winter days are short, that light can be the difference between eggs and excuses. Just don’t overdo it; hens need their sleep more than you need one extra egg.
I like one simple, shielded light in the center and, if possible, an outlet near the waterer for a heater in deep winter. It’s worth thinking through on paper instead of running extension cords in the mud later.
Using ready-made chicken coop drawings and kits wisely
These days you don’t have to scratch a coop plan on a feed bag like I did. There are plenty of ready-made chicken coop drawings and even full kits with all the pieces cut. Some are smart and sturdy. Some, well, let’s just say they’re better for cartoons than real winters.
When I look at a pre-made drawing or kit, I ask myself:
- Is there enough real space for the number of hens it claims?
- Do I see hardware cloth anywhere, or just thin wire?
- Does the roof pitch make sense for my snow and rain?
- Is the wood thickness on the drawing something I trust, or more like a shipping crate?

I don’t mind starting with a store-bought drawing, then improving it. Sometimes I add extra ventilation, beef up the floor, or extend the run. A good drawing is a map, not a cage; you’re allowed to change the route.
I’ll browse some nowCoop design tips for healthy, steady laying hens
A chicken coop drawing isn’t just about lumber. It shapes the health of your flock and how many eggs you carry back to the kitchen. Laying hens are creatures of habit, and the coop teaches those habits.
Light, quiet, and routine
In the drawing, nests should be in a darker, quieter corner of the coop. Hens like a bit of privacy when they’re making breakfast for you.
- Windows should bring light into the main area, not right into the nests.
- The path from roost to nest to feeder should be simple and calm.
- No loud doors slamming near the nests if you can help it.
Clean water and dry feet
Your chicken coop drawing should show where the waterer goes. I try to keep it away from the bedding corner so spills don’t turn the whole floor into a swamp.
I also like a little roof or sheltered spot in the run where water sits out of the direct sun. Hot water isn’t much fun for hens, or anybody else.

Questions folks ask about a chicken coop drawing
Take the inside floor space from the drawing and divide by four if you’re keeping standard laying breeds. That gives you a good starting number. So a 6x8 foot coop on the plan (48 square feet) is comfortable for about 10–12 hens, as long as the run is generous too.
No plan survives its first mud season untouched. I treat a chicken coop drawing as a strong suggestion, not scripture. Follow the basic structure, but adjust doors, vents, or run size to match your land, weather, and how you like to work.
For me, it’s poor ventilation. If you only see tiny windows and no clear upper vents, that’s a red flag. Chickens breathe out a lot of moisture, and without a way out, that moisture turns to frostbite in winter and stink in summer.
Cute doesn’t keep birds warm. If you face real winters, you want thicker walls, a real roof pitch, and a bit of extra space on the drawing so hens aren’t crammed in on storm days. A simple, sturdy box is better than a fancy dollhouse when the wind howls.
I like the run on the same drawing so I can see how doors line up, where shade falls, and how water drains. The coop and run work as one system, and the paper should show that partnership before you dig the first post hole.
If you’re ready to turn your chicken coop drawing into a real, dry, egg-filled coop, take a slow look through the different designs and setups available. Pick the one that fits your land, your weather, and the way you like to work.
I’ll explore coops now