
Chicken coop insulation
Chicken Coop Insulation
I’ve raised laying hens through Midwest blizzards and summer heat waves. Done wrong, chicken coop insulation turns into a damp, drafty mess. Done right, it keeps birds laying strong when the water buckets freeze. Let me walk you through what actually works out here in the real world.
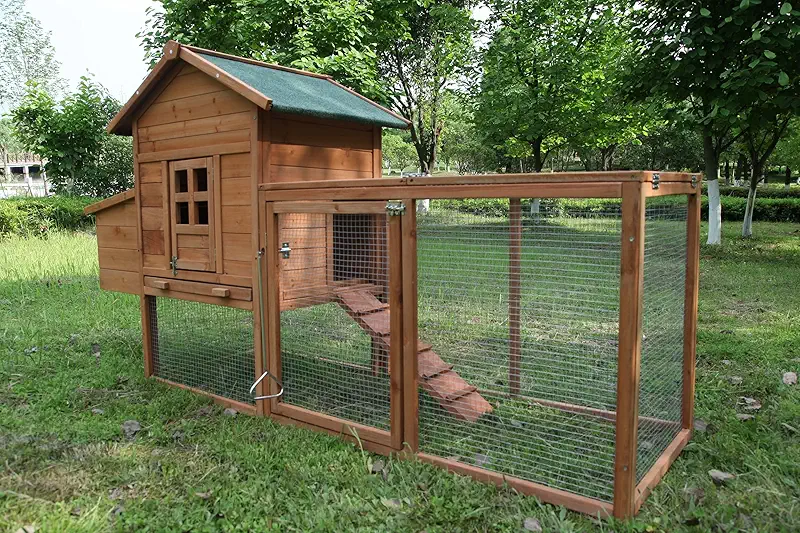
Why chicken coop insulation matters more than you think
When folks ask me about eggs, they usually ask about feed first. I always smile and say, “Feed matters, but comfort comes first.” A hen that’s shivering all night is not worried about laying you breakfast. She’s just trying to stay alive.
Chicken coop insulation is really about steady comfort, not turning your coop into a little house. Hens handle cold better than people, but they hate drafts and they hate damp. If your coop is bone‑dry, out of the wind, and just lightly insulated, your girls will surprise you with how tough they are.
I still remember a winter when the wind chill hit negative numbers for a week straight. My neighbor’s birds slowed down to almost no eggs. Mine? Still a decent basket every other day. The main difference was simple: better chicken coop insulation, and better ventilation up high so the air stayed dry.
“Insulate enough to take the edge off, ventilate enough so you never smell ammonia when you open the door.”
If you crack that balance, you’ll have healthy, steady layers all winter long.
The big balance: warm, but never stuffy
Insulation without ventilation is like wearing a thick winter coat in a sauna. Your birds end up sleeping in damp, stale air, and that’s when frostbite and respiratory issues show up. So before you staple a single panel of foam, think about this balance:
- Draft‑free at bird level – no wind blowing across their backs on the roost.
- Good airflow up high – vents near the roof so warm, moist air can escape.
- Dry bedding – moisture is the real enemy in winter.
- Moderate insulation – enough to soften the cold, not “house level” cozy.
A lot of folks worry more about the cold than the wet. Truth is, I’ve seen frostbit combs at just below freezing when the air inside the coop was damp and still. And I’ve seen birds just fine at much lower temperatures when the coop was dry, insulated, and gently ventilated.
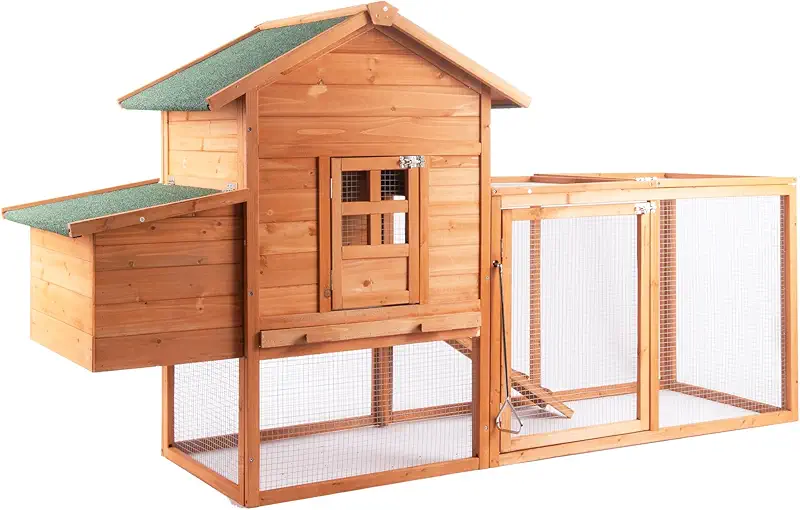
Best materials for chicken coop insulation (from a practical farmer)
Out here, I don’t have time for fussy setups. I need materials I can cut, fit, and replace without turning the coop into a construction site. Here’s what I’ve used and what I think of each option for chicken coop insulation.
1. Rigid foam boards
Rigid foam is my workhorse. It’s light, easy to cut, and gives you a lot of insulation in a thin layer. I like to cut panels to fit between the wall studs, then cover them with plywood or OSB inside the coop so the hens can’t peck at the foam.
- Good for walls and ceiling.
- Stays dry if there’s a little condensation.
- Must be fully covered so birds don’t eat it.
2. Rockwool or mineral wool
This stuff handles moisture better than regular fiberglass, and mice don’t seem to love nesting in it as much. It’s a bit itchy to work with, so wear gloves, but once it’s in the wall and covered, you can mostly forget about it.
3. Reflective bubble wrap / foil
I use reflective insulation in spots where the sun really beats down. It shines heat back out in summer and adds a bit of warmth in winter when there’s a temperature difference. It’s not magic, but it’s handy as a second layer behind a more solid material.

4. Straw bales and natural tricks
When money was tight, I leaned hard on old‑fashioned ideas. I stacked straw bales along the outside walls on the north and west sides of the coop. That simple windbreak made a world of difference. It’s not “insulation” in the technical sense, but it’s cheap, fast, and it works.
The trick with straw bales is you want them off the ground and not tight against damp soil. Otherwise they soak up water and mold. Pallets under bales make a fine base.
5. What I usually avoid
- Loose fiberglass where birds can reach it – they’ll peck it and regret it.
- Cardboard as the main insulation – soaks up moisture, mice love it.
- Anything smelly (old carpet, treated materials) inside the coop.
How to insulate a chicken coop step by step
Let me lay out the simple process I use when I’m insulating or upgrading a coop. Nothing fancy, just a farmer’s checklist that’s kept my hens laying through some ugly weather.
Step 1 – Study the wind and sun
Stand by your coop on a cold, windy day and pay attention. Where does the wind hit hardest? Which wall gets the morning sun? I like to:
- Block or insulate the north and west walls first (worst wind in my area).
- Protect the roost area especially – that’s where hens spend long winter nights.
- Leave some sun‑facing openings for light, but frame them well.
Step 2 – Seal obvious drafts (but not all gaps)
I use caulk or spray foam in big, ugly cracks where I can feel wind blasting through. But I do not seal every tiny gap like it’s a spaceship. Chickens need fresh air; we’re just trying to stop that sharp winter wind from blowing right across their backs.
Step 3 – Add chicken coop insulation in layers
For most small backyard coops, a single layer of rigid foam between studs, covered with thin plywood inside, is plenty. On larger coops, I sometimes pair mineral wool with a reflective layer near the roof.
I think in layers:
- Outside skin – siding, metal, or boards to stop the weather.
- Insulation layer – foam or wool tucked between studs.
- Inside cover – smooth surface the birds can’t destroy.

Step 4 – Vent high, protect low
Think of the coop like a wood stove chimney. Warm, moist air wants to rise. Give it a way out up near the roof with protected vents covered in hardware cloth. At the same time, make sure the bottom half of the coop is solid and draft‑free where the birds actually sleep.
Step 5 – Bedding and deep litter
In winter I like a deep litter method: start with a decent bed of dry shavings, and keep adding clean layers on top. As it slowly breaks down, it creates a little natural warmth underfoot. The key is to keep it dry and fluffy, not wet and matted.
Real‑world tips from many frozen mornings
I’ve had my beard freeze, my coffee ice over in the truck, and still walked into a coop that felt almost cozy. Not toasty, just gently above “miserable.” That’s what you’re aiming for with good chicken coop insulation.
Watch the waterer
If the waterer freezes solid in minutes, your coop is too drafty or too open. If it’s just a skim of ice by morning, you’re probably close to right. I sometimes use a heated water base, but even that can’t keep up if the coop leaks wind like a barn with missing boards.
Check combs and toes
Roosters and big‑combed breeds are the first to show trouble. A little pale tip on a comb usually means they’re sleeping in damp air or a draft. That’s your sign to improve ventilation up high and make sure your chicken coop insulation isn’t trapping moisture.

Use your nose
When I open the coop in the morning, I take one deep breath. If I smell sharp ammonia, the air wasn’t moving enough overnight or the bedding is too wet. Chicken coop insulation should never mean a stuffy coop. Better to lose a little heat and keep the air fresh.
Don’t chase “living room warm”
You don’t need 70°F for hens. They’re wearing down jackets 24/7. You’re just trying to protect them from extremes and give them a steady, dry place to sleep. A slightly chilly coop that’s dry and draft‑free beats a warm, wet coop every single time.
Summer and shoulder seasons: insulation still matters
Folks usually think about chicken coop insulation only in winter, but I’ve lost more birds to summer heat than to cold. Good insulation and smart design help in July just as much as in January.
Keeping hens cool when the sun bakes
In hot months, insulation slows heat from baking through the roof and walls. Pair that with shade and airflow, and your hens will pant less and eat better. I keep vents open wide and sometimes add a little fan pointed across the ceiling, not right at the birds.

Spring and fall are sneaky
Those in‑between seasons are when birds like to get sick. Warm days, cold nights, damp ground. Insulation smooths out those swings so your flock isn’t riding a temperature roller coaster every 24 hours.
If your coop feels just a little cooler than outside on a hot day and just a little warmer than outside on a cold night, you’ve got your chicken coop insulation about right.
Matching your coop and insulation to your climate
One thing I’ve learned talking with other farmers from Texas to Minnesota: there’s no single “right” setup. The best chicken coop insulation depends on where you live and what your winters look like.
Very cold climates (long freezes, deep snow)
- Insulate walls and ceiling with rigid foam or mineral wool.
- Use deep litter and a solid, draft‑free roost area.
- Plenty of roof‑level vents, but close big side openings in winter.
- Consider an attached, well‑insulated small coop inside a larger shed.
Moderate climates (freeze some nights, mild days)
- Focus insulation on north and west walls and the ceiling.
- Build good roof overhangs and windbreaks outside (fence, shrubs, bales).
- Use windows or vents you can adjust easily as weather flips.
Hot climates (rare freezes, long hot summers)
- Light insulation in roof to fight sun more than cold.
- Big vents and open sides you can close only during storms.
- Reflective materials on sunny sides, lots of shade trees if you can.

Choosing a coop that’s easy to insulate
If you’re still shopping for a coop, you’re in a good spot. Some designs make chicken coop insulation simple, others turn it into a headache.
Features that make life easier
- Framed walls with studs you can slide insulation between.
- Solid roof with enough pitch and space to add insulation underneath.
- Access panels big enough for you to reach in and work.
- Flat interior surfaces you can cover and clean without scraping around odd corners.
When I look at a new coop, I ask myself, “Can I add a layer here if I need it?” If the answer is yes, that coop will grow with your flock and your climate. If the answer is no, I keep looking.

If you’re like me, you’ll want to see how different coop designs handle walls, roofs, and vents before you decide. Looking through real examples can spark ideas you won’t get on a notepad.
Let me browse coopsFAQ about chicken coop insulation
Chickens can take more cold than we give them credit for, but they do need protection from wind and damp. In mild climates, a draft‑free, dry coop with deep bedding might be enough. In colder areas, some chicken coop insulation in the walls and ceiling helps keep the temperature steadier and reduces stress so hens keep laying better through winter.
Yes. If you insulate heavily and don’t provide enough ventilation, moisture builds up fast from breathing and droppings. That damp air leads to frostbite and breathing problems even if the coop feels warm. Aim for moderate insulation with strong roof‑level ventilation, not a sealed‑up box.
The safest insulation is whatever your birds cannot reach. Rigid foam, mineral wool, and similar products all work if they’re fully covered with wood or other solid panels inside the coop. Never leave fluffy fiberglass or exposed foam where curious beaks can peck at it. If you’re not sure, cover it.
A well‑insulated coop will feel just a bit warmer than outside on cold nights, without being stuffy. You shouldn’t see birds huddled in a tight panic on the roost, and you shouldn’t smell ammonia in the morning. If waterers only lightly freeze and combs stay clean and healthy, your chicken coop insulation is likely doing its job.
Usually you don’t change the insulation itself, but you do change how open the coop is. In summer, I keep all vents wide open and sometimes add extra openings covered with hardware cloth. The same chicken coop insulation that softens winter cold can also slow summer heat if you pair it with good ventilation and shade.
Bringing it all together
When I walk into my coop on a cold, dark morning and hear quiet clucks and soft rustling instead of frantic squawking, I know the setup is right. The walls hold off the worst of the wind, the chicken coop insulation keeps the chill from biting too hard, and the air is clean and dry. That’s all our birds are really asking for.
You don’t need a fancy building or a big budget. You just need to think like a hen: no drafts on the roost, dry feet, fresh air, and steady light. Do that, and they’ll pay you back with bright yolks and steady eggs, even when the weather is trying its best to talk them out of it.
If you’re planning your first coop or looking to upgrade the one you’ve got, it can help to see how different designs handle walls, roofs, and vents. I like to “window‑shop” a bit, then walk back out to my own coop with new ideas to steal.
Take a slow look around, imagine your birds roosting on a quiet winter night, and choose something that feels easy to keep dry, snug, and simple.
Show me more coops