
Chicken coop vent
Out here on my little U.S. farm, I learned the hard way that a chicken coop vent is not just a fancy extra. It is the quiet worker that keeps your hens breathing easy, keeps the stink down, and keeps you from waking up to sick birds and a guilty conscience. Over the years, I have seen good vents save flocks, and bad vents ruin winters.
When folks ask me what to fix first in their coop, I usually say, “Ventilation… then everything else.” You can have the prettiest coop in the county, but if the air sits like old dishwater, your hens will let you know. Fewer eggs, wet bedding, coughing birds, and that eye-watering smell of ammonia that hits you in the nose like a rude cousin at Thanksgiving.
In this guide I am going to walk you through how I think about ventilation as an old farm hand: what a chicken coop vent really does, where to put it, how big to make it, and what kind of vents I trust in my own hen houses. I will share some mistakes I made so you do not have to make them, and we will keep the language plain and honest. No fancy talk. Just what works.
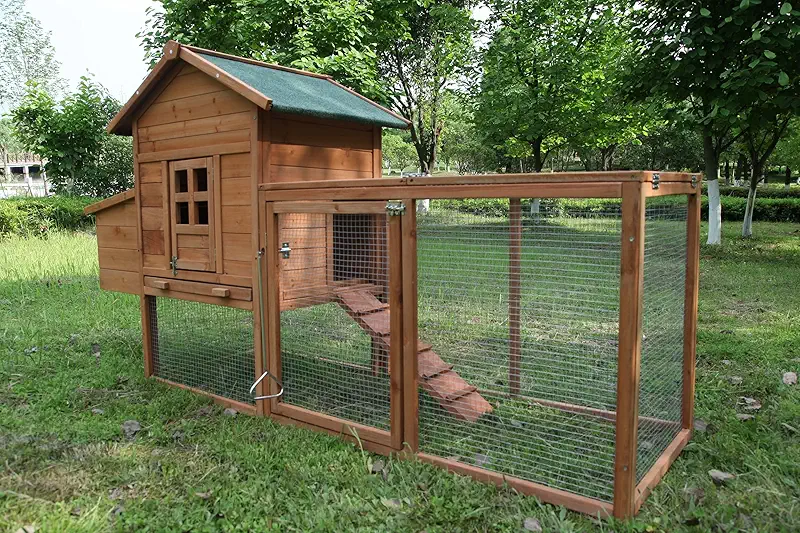
Why a chicken coop vent matters more than you think
I still remember one January morning, years back, stepping into my first “proper” coop. I had built it tight as a drum to “keep the hens warm.” I was proud of that little red palace. But when I opened the door after a freezing night, the windows were dripping, the air was heavy, and my glasses fogged right up. The chickens were quiet, and that is never a good sign.
The problem was simple: not enough vent space. Chickens breathe out warm, wet air. Their droppings give off moisture and ammonia. If that moisture has no way out, it clings to the walls, soaks into the bedding, and settles on your birds’ lungs. A good chicken coop vent lets the bad air rise and escape while fresh air slips in without chilling the hens.
Think of the vent as the lungs of your coop. No lungs, no life. With good airflow:
- Your coop smells more like dry straw, not like a bus station restroom.
- The bedding stays drier, so you change it less and save money.
- Your hens fight fewer respiratory issues and eye problems.
- Frostbite on combs and wattles is far less likely in winter.
- Egg production stays steadier through the year.
Once I cut in proper vents on that first coop, the difference was like opening a window in a stuffy bedroom. The smell faded, the moisture dropped, and the hens perked right back up. I learned my lesson, and I have never built a coop without planning the vents first.
How big should a chicken coop vent be?
I am a simple man, so I like simple rules. For backyard flocks, a good rule of thumb that has worked for me is about 1 square foot of ventilation per 10 square feet of floor space at the very bare minimum, and more is usually better as long as it is placed right and protected from drafts.
Let us say you have a 4x8 coop, which is 32 square feet. I like to have at least 3–4 square feet of vent openings in that size, spread high up near the roof, not down at chicken level. That might be a pair of long vents under the eaves, a gable vent on each end, or a combination of both.
Now, I know some folks worry that “too much vent” will make the chickens cold. The truth is, cold and dry is far safer than warm and damp. My hens have handled bitter Midwest winters just fine as long as I keep the drafts off them directly and the vents up high. They fluff their feathers, tuck their feet, and carry on like little feathery tanks.
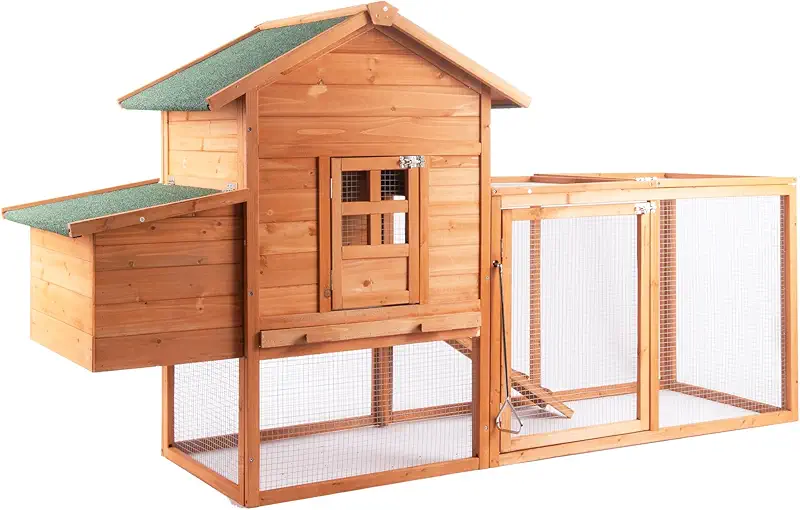
Different coops need different vent layouts. I like simple vents I can slide or swing open and close with one hand, even with gloves on and a cup of coffee in the other.
Where to place your chicken coop vents
Good ventilation is not just about size; it is about placement. If you only remember one thing from this old farmer, remember this: vents high, birds low.
High on opposite walls
I like to put vents on two opposite sides of the coop, up near the roofline. That way, warm, moist air can rise and escape, and a gentle flow moves across the top of the coop like a lazy breeze, not a cold blast. If you have a peaked roof, a vent in each gable end works real nice.
Avoid direct drafts on the roost
I learned this one when I thought I was being clever. I put a vent right in front of my roost, chest-high to the birds. The air shot across their faces all night long. The next morning, a couple of combs looked like they had been dipped in white paint. Frostbite.
Since then, I keep big vents at least a foot or two above where the chickens roost. If I do put a small vent lower down, I baffle it, angle it, or cover it with a baffle board so the air is turned up, not straight at the birds.
Use natural wind without fighting it
Each property has its own “prevailing wind.” On my land, most winter wind comes from the northwest. So I try to keep the coop’s most open vents away from that side, or protected a bit, while still giving enough airflow. Think of your coop as a comfortable barn: open, but not exposed.
Types of chicken coop vents this old farmer trusts
There are more styles of chicken coop vent out there than there are ways to fry an egg. Over time, I have come to like a few types best, just because they last, they are easy to adjust, and they do not give me headaches when a storm rolls in.
1. Soffit and eave vents
These vents run under the edge of your roof and let air rise out while staying pretty well sheltered from rain and snow. I like them because they are long and narrow, so you get nice even airflow. Covered with hardware cloth, they also keep raccoons, rats, and curious opossums from treating your coop like a midnight buffet.
2. Gable vents
A gable vent at each end of the coop is simple and effective. They look a bit like the vents on old barns. They let hot air out in summer and wet air out in winter. Add a hinged cover or a sliding shutter, and you can tame the airflow when the weather gets wild.
3. Sliding side vents
On my main laying house, I built long, horizontal vents right under the roof that slide open and closed like little barn doors. In July, I slide them wide open and let that sweet summer breeze roll through. In January, I close them most of the way, leaving just enough gap for the air to sneak out. No ladders, no drama—just a good handle and a simple track.


4. Roof vents and ridge vents
Some coops use little roof vents or a full ridge vent along the peak. I like these on bigger coops, where the ceiling is high and the birds are well below the vent line. They pull that hot, moist air straight up and out. Just be sure there is a good overhang or cap so rain and snow do not fall straight into your bedding.
Whatever style you choose, the key is strong mesh, solid framing, and a way to adjust the opening without needing a circus act and a tall ladder at 6 a.m. in the snow.
How I protect chicken coop vents from predators and weather
Vents are wonderful for air, but they are also a favorite invitation for everything that wants chicken on the menu. I have had raccoons reach through weak wire, and I once saw a snake try to squeeze through a cheap vent screen like it was testing its jeans after Thanksgiving.
Use hardware cloth, not flimsy screen
I use 1/2-inch galvanized hardware cloth on every vent in my coops. Chicken wire is for keeping chickens in, not keeping predators out, and window screen is just an expensive napkin for a determined raccoon. Hardware cloth holds up year after year, and when I screw it down tight with washers, nothing bigger than a beetle is getting through.
Add covers or shutters
In my climate, we get sideways rain and the occasional “snow that shows up angry.” So my vents all have some form of cover, flap, or shutter. It does not have to be fancy: a hinged board, a simple slider, or a louvered vent you can tilt. The point is giving yourself options when the weather has a mood swing.

A good chicken coop vent setup keeps out claws, teeth, and beaks while still letting the air roll through gentle and steady.
Angle and overhang
When I cut vents into walls, I like to tuck them under a roof overhang or add a little hood over the opening. It does not take much—just enough that the rain has to fight gravity and lose. The same trick works with snow and sleet. Your hens get the fresh air without waking up under a drip line.
Seasonal venting: winter vs. summer
Your chickens need fresh air all year, but how you use your chicken coop vent changes with the seasons. I like to think of it the same way I treat my own house: windows wide in spring, cracked in winter, never sealed up like a sealed jar.
Winter: cold and dry beats warm and wet
In winter, it is tempting to close every crack and hole. I tried that. All I got was damp bedding, coughing hens, and a strong reminder from Mother Nature that moisture plus cold equals frostbite. Now I keep vents open high and block direct drafts down low. The air keeps moving, the moisture escapes, and my birds stay healthy, even if the thermometer tries to scare me.
Summer: shade, airflow, and calm hens
Hot, still air is harder on chickens than cold air. When summer rolls in, I open every vent I can without turning the coop into a wind tunnel. I also make sure there is shade on the sunniest sides of the coop. A big tree, a shade cloth, or even an old sheet hung up in a pinch will help.
On the hottest days, I sometimes prop the people door open with a screen in place, or use extra temporary vents that I can remove once fall returns. Chickens handle heat better when the coop breathes like a porch, not like a closet.

Simple signs your chicken coop vent is doing its job
You do not need a lab coat to know if your coop ventilation is working. Your nose, your eyes, and your hens will tell you plenty. Here is what I look for on my rounds:
- Smell test: When you open the coop, you should not get hit with a strong ammonia smell. A faint farm smell is normal. Burning eyes and nose is not.
- Moisture check: Look at windows, walls, and the inside of the roof early in the morning. If everything is sweating, you need more vent or drier bedding—or both.
- Bedding feel: Grab a handful of bedding from under the roost. If it feels damp and clumpy, moisture is winning. Dry and crumbly is the goal.
- Comb and wattle health: In winter, watch for pale or blackened tips on combs and wattles. That is frostbite, and poor ventilation often plays a role.
- Behavior: Hens that are perky, chatty, and scratching around are usually breathing well. Quiet, lethargic birds are asking you for help.
A good chicken coop vent setup will make your daily chores feel easier. You step into the coop, and it just feels calm and dry. That feeling is worth a lot more than fancy trim or cute paint colors.
Choosing a ready-made coop with proper vents
Not everyone wants to spend weekends with a saw and a pile of lumber. If you are looking at ready-made coops, the chicken coop vent is still something you need to size up like an old-timer at an auction.
When I look at pre-built coops and kits, I check:
- Are there vents high up on at least two sides?
- Is there real hardware cloth on the openings, not just soft screen?
- Can I open and close the vents easily from the ground?
- Is there decent roof overhang to shield the vents from weather?
- Does the amount of vent space seem reasonable for the number of birds they claim it holds?
A lot of glossy catalog coops look cute but have the ventilation of a shoebox. I would rather have a plain coop with smart airflow than a fancy one that turns into a moldy sauna inside.
Let your eyes wander through real coops
If you want to size things up the way I do, take a slow look through different chicken coops and pay close attention to how the vents are set up. Picture your climate, your winters, your summers, and how those openings will handle all that. Trust your gut; if a coop looks stuffy in a photo, it will not smell better in your backyard.

Chicken coop vent – common questions answered
How much ventilation does a small backyard coop really need?
For a modest backyard coop, I like to see at least 3–4 square feet of vent opening for a 4x8 coop, and more does not hurt if it is placed high and protected from drafts. I would rather cut in a bit too much and close it down in winter than wish I had more when the walls start sweating. Err on the side of fresh air and dry bedding.
Will a chicken coop vent make my hens too cold in winter?
Not if you set it up right. Cold air itself is not the real villain; moisture and drafts are. I keep vents high above the roost so the air moves over the birds’ heads, not across their backs. My hens have handled temperatures well below freezing with plenty of ventilation and no trouble. They would rather be cold and dry than warm and damp.
Where should I NOT put vents in my coop?
I avoid big open vents right at roost height or down low where the birds sleep. I also do not put unprotected vents on the side that catches the worst winter wind. A little opening is fine, but big, unshielded holes at bird level are just asking for drafts and frostbite. Think “high and sheltered” for the main venting.
How do I know if my chicken coop vent is too small?
If you smell strong ammonia when you open the coop, see condensation on windows and walls, or find the bedding damp even though you clean regularly, your venting is probably too small or in the wrong place. Your hens may also cough, wheeze, or look a little dull-eyed. Add more vent area up high and see how the coop feels after a few days.
Do I need to close vents completely in bad storms?
I rarely close every vent. Instead, I close the ones facing the worst wind and rain, and leave others slightly open so the coop can still breathe. If you design your ventilation with some overhangs and angled covers, you can usually keep a bit of airflow without soaking your bedding. Completely sealing a coop, even for one long storm, can leave you with a damp mess.
Bringing it all together: a coop that breathes
After years of early mornings, late nights, and more than a few shovel loads of chicken manure, my view is simple: a chicken coop vent is not an accessory; it is part of the health plan for your flock. You do not have to be perfect. You just have to give your birds clean, moving air without turning their bedroom into a wind tunnel.
Plan for more vent space than you think you need, put it up high, protect it with hardware cloth, and give yourself a way to open and close things as the seasons change. Your hens will pay you back in strong eggs, bright eyes, and that contented clucking you hear when you open the door and everything just feels right.
Whether you build your own coop from scratch or pick out a ready-made one, let your first question be, “How does the air move in here?” Once you answer that, the rest—feeders, nest boxes, paint colors—starts to feel a whole lot easier.
