
Diy chicken coop plans
I’ve been raising laying hens out here in the States for more years than I care to admit. Let me walk you through simple, honest DIY chicken coop plans that keep your girls safe, dry, and laying strong.
When folks ask me about diy chicken coop plans, I always say the same thing: start with the hens, not the hammer. Your birds don’t care how pretty the coop looks. They care if it’s dry, safe, and easy to live in. You and I care if it’s easy to clean.
I’ve built coops from old pallets, shiny new lumber, and once from an ancient shed that was leaning like a drunk scarecrow. Some worked great, some… not so much. The good news is, you can skip my mistakes. I’ll share what has actually worked in my own yard, in real weather, with real stubborn hens.
On this page I’ll show you how to size a coop, what to use for flooring, how to think about ventilation, and a few tricks to keep eggs clean and chores quick. I’ll also point you toward ready-made plans and kits you can lean on when you don’t feel like wrestling with a tape measure.
Let me see options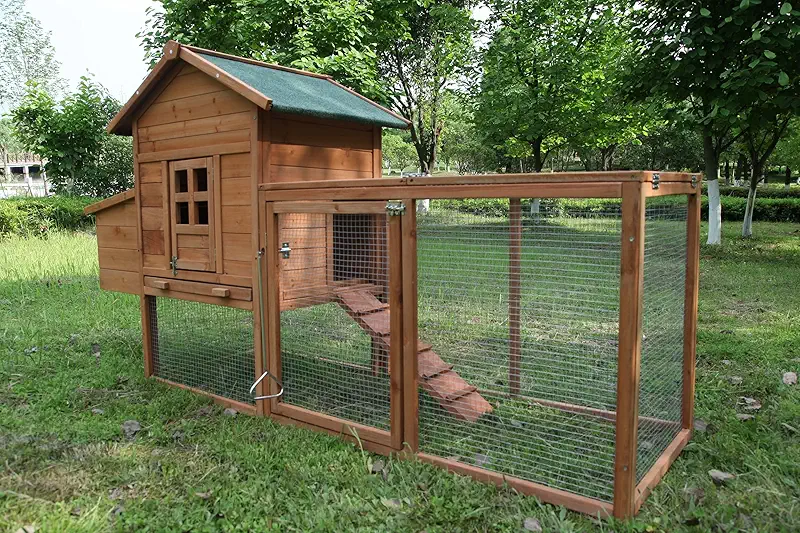
Start your diy chicken coop plans with the hens, not the lumber
Out here, we say every chicken tells you what kind of coop she needs, if you just pay attention. Before you sketch a single line, answer three simple questions:
- How many hens are you planning for now?
- How many might you have a year from now? (Chicken math is real.)
- What kind of weather does your yard throw at you?
When I built my first coop, I “planned” for six hens. Within a season, I had twelve. Turns out, baby chicks are just as hard to resist as donuts. If I had sized that coop only for six birds, I’d have been rebuilding by fall. Give yourself a little space buffer; future you will thank present you.
That’s the heart of sensible diy chicken coop plans: honest numbers, realistic weather, and a coop that’s easy to live with day after day.
How big should your diy chicken coop be?
You’ll hear a lot of numbers tossed around. Here’s what has worked for my laying flocks on real dirt:
Indoor coop space
As a simple guideline:
- 4 square feet per bird inside the coop (minimum for standard hens)
- 5–6 square feet per bird if your winters are long and they’ll be cooped up more
- 3 square feet per bird if they free-range almost every day in mild weather
So for 8 hens, a 4 ft x 8 ft coop is a nice, workable size. I’ve run that setup myself for years.
Outdoor run space
Hens with room to move are calmer, healthier, and lay better eggs. I’ve seen it over and over. Aim for:
- 8–10 square feet of run per bird if they’re confined
- Less if they free-range most days, but more is always better
When you draw out your diy chicken coop plans, sketch in where your own feet will go. Think about doors, access panels, and headroom. Your back is part of the flock too.
Essential pieces of every good diy chicken coop
No matter if your coop is fancy or plain, there are a few non‑negotiables. Skip these and you’ll be chasing problems instead of eggs.
Solid, dry floor
Keep the floor off the ground if you can. I like raised wooden floors with a deep layer of shavings. Dirt floors can work in dry areas, but rats love them.
Real ventilation
Chickens breathe out a lot of moisture. You want vents high up under the eaves, windows that can open, and no drafts at bird level. Dry air means fewer health issues.
Safe roosts
Use 2x4 lumber laid flat, edges slightly rounded. That wide surface keeps their toes warm in winter. Plan 8–10 inches of roost space per hen.
Nesting boxes
One box for every 3–4 hens is fine. Hens like to share, and they’ll all choose the same favorite box anyway. Make them easy to open from the outside if you can.
Over the years, I’ve come to like simple, rectangular coops. Straight cuts, easy math, and no weird angles for water to sneak through. Fancy rooflines look nice on Pinterest, but they don’t count for much when you’re out there in a snowstorm with a flashlight.
Materials for diy chicken coop plans: what has actually lasted
I’ve tried all sorts of materials. Some aged like a fine cheese; some aged like milk in the sun. Here’s what has held up best for me.
Framing and walls
Pressure‑treated 4x4s or 2x4s on the skids or base, regular 2x4 framing above that. For walls, exterior plywood or decent siding panels do the job just fine.
I once tried to “save money” using old, half‑rotten boards from a collapsed shed. All I saved was a pile of work and a great home for termites. Start with straight, sound lumber.
Wire and predator protection
This is where you do not cut corners. I learned that the hard way after a raccoon tore through cheap wire like it was spaghetti.
- Use 1/2" hardware cloth, not chicken wire, for any predator‑facing area
- Bury wire 12–18 inches around the run or bend it out in an “apron”
- Secure every edge with staples or screws and washers, not just a nail or two
Chicken wire is for keeping chickens in. Hardware cloth is for keeping predators out. Your diy chicken coop plans should always bet on the smarter animal — and that’s the predator.
Roofing
A simple sloped metal roof has been my favorite: easy to clean off leaves and snow, lasts a long time, and doesn’t mind a branch or two falling on it. Shingles work too, just be sure you have enough pitch so water doesn’t linger.
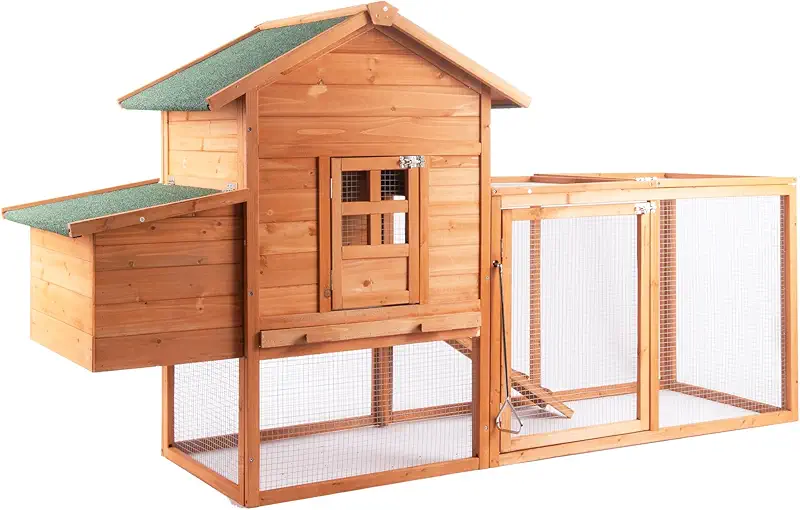
Simple layout ideas for diy chicken coop plans
You don’t need architectural software to plan a good coop. A pencil, a tape measure, and a bit of common sense will do.
The “walk‑in shed” style
This is the style I recommend to most folks:
- Door tall enough for you to walk in easily
- Roosts along the back or one side
- Nesting boxes along the opposite wall, at about chest height for you
- Windows high enough that hens can’t roost in them
With this setup, cleaning is simple. You walk in with a shovel, pull bedding into a bin, and you’re done. No crawling, no cursing, and no banging your head on a too‑low roof.
The “coop and attached run” combo
For backyards, I like an elevated coop with a covered run attached:
- Coop raised 2–3 feet off the ground, and the shaded space underneath added to the run
- Ramp or ladder leading up to the coop door
- Roof that covers both coop and part (or all) of the run
This makes good use of space and keeps things drier in rainy areas. Just be sure your ramp isn’t too steep; I’ve had more than one hen slide down like a kid on a playground.

Little features that make daily chores easier
This is where farmer experience really pays off. A few small choices in your diy chicken coop plans can shave minutes off chores every single day.
Easy egg collection
If you can, put your nesting boxes so they can be reached from outside the coop. A simple hinged lid with a latch means you can gather eggs in your slippers on cold mornings.
Big, wide door for cleaning
I like a door at least 30 inches wide, more if I can manage it. That way a wheelbarrow can get close, and I’m not trying to squeeze a shovel through a little gap.
Feed and water placement
Hang the feeder at about the height of the hens’ backs. High enough so they don’t scratch bedding into it, low enough they can reach it comfortably. Same idea for waterers. Keeps things cleaner and saves you money on feed.

Using ready-made kits and plans with your DIY coop
Not every part of a coop needs to be from scratch. I’ve mixed my own carpentry with ready‑made pieces plenty of times, and my hens never complained once.
You can use pre‑built coops or kits as:
- The main coop, with a larger custom run added on
- A brooder or grow‑out pen for young birds, next to your main coop
- A starter coop while you build your “forever” coop
Factory‑made coops and well‑drawn plans often give you good ideas about layout, door placement, and clever little features you might not have thought of. Think of them as suggestions you can steal with pride, then adjust for your yard.
Compact backyard coop ideas
Handy for small yards or tight spaces, these designs often show smart ways to tuck nesting boxes, doors, and ramps into a small footprint.
I’ll peek at theseWalk-in coop and run layouts
If you’ve got a bit more room, these setups save your knees and back, and they’re a lot easier to keep clean through all four seasons.
Show me bigger onesSturdy hardware and accessories
Things like latches, hinges, vents, and hardware cloth may not look exciting, but they’re what stand between your flock and night visitors.
I need the tough stuff
Keeping your laying hens happy in your new coop
A well‑built coop is just the start. Happy, steady‑laying hens come from daily habits that are simple enough you actually keep them up.
Light, feed, and water
Hens need around 14–16 hours of light to lay their best. In winter, I use a simple timer and a low‑watt bulb, turning on in the early morning. Nothing fancy, just enough to stretch the “day” a bit.
Keep a good layer feed available at all times and fresh water where it won’t freeze. I’ve hauled enough buckets through snow to tell you: if you can run a safe electric line for a heated water base, do it. Future you will raise a mug of coffee in your honor.
Nesting behavior
Put a fake egg or golf ball in each nesting box to give the girls the hint. Keep boxes bedded with clean shavings or straw. If you start seeing messy eggs, it usually means:
- Bedding is too thin or too dirty
- The girls are sleeping in the boxes (give them better roosts)
- Boxes are lower than the roosts and look like a cozy bed

Seasonal adjustments for your diy chicken coop
Coops don’t live in perfect weather. They live in real seasons, with mud, wind, heat, and the odd surprise storm. Good diy chicken coop plans think through the year.
Winter tweaks
In cold states, folk often worry more about heat than they should. Chickens wear down coats year‑round. What they really need is:
- Dry bedding and no drafts at roost level
- Plenty of ventilation high up to let out moisture
- Liquid water they can reach all day
I don’t heat my coops, even when the thermometer dives. I just make sure it’s dry, the air can breathe, and the birds can roost with their feet tucked under them.
Summer tweaks
Heat is actually harder on hens than cold. Plan for:
- Shade over at least part of the run
- Wide‑open windows with predator‑proof wire
- Good airflow through the coop
On the hottest days, I freeze jugs of water and set them around the run. The hens gather near them like farmers at the feed store coffee pot.

Common mistakes I see in diy chicken coop plans
I’ve walked through a lot of homemade coops over the years. Most of the trouble comes from the same handful of missteps. If you can dodge these, you’re already ahead.
- Too small: Looks fine when empty, feels crowded once birds arrive.
- Almost no ventilation: Windows that never open, no vents at the top.
- Chicken wire on the run: Raccoons and dogs treat it like a suggestion, not a barrier.
- Hard-to-clean layout: Tiny doors, low roofs, and dead corners packed with manure.
- Low nesting boxes: Hens sleep in them, poop in them, and eggs stay dirty.
When you look at ready‑made coops or detailed plans, notice how they handle these same issues. Borrow what’s smart, skip what doesn’t suit your yard, and don’t be shy about improving on what you see.

FAQ about diy chicken coop plans and laying hens
How many hens can I keep in a small backyard coop?
For a typical suburban yard, I like to see 4–6 hens in a modest coop with a decent run. If your indoor coop is around 4 ft x 6 ft and you’ve got a fenced run or some free‑range time, that’s a comfortable setup. It’s better to have fewer hens living well than more hens crowded and stressed.
Do I really need hardware cloth, or is chicken wire enough?
If you’ve got predators (and you do, even if you haven’t met them yet), hardware cloth is worth every penny. Chicken wire keeps chickens in. Hardware cloth keeps raccoons, dogs, foxes, and coyotes out. My early coops with chicken wire taught me that lesson the painful way. Now every new coop gets hardware cloth on runs, windows, and vents.
What’s the best floor for a diy chicken coop?
I like a raised wooden floor with several inches of shavings. It stays drier than dirt, is easier to clean, and keeps rats and snakes from sneaking in underneath if you block the gaps well. In very dry climates, a dirt floor can work, but you’ll want good drainage and a solid wire barrier under the soil to stop digging predators.
How high should roosts and nesting boxes be?
I set roosts about 2–3 feet off the floor for standard breeds, a bit lower for heavy birds. Nesting boxes should be lower than the roosts but high enough that bedding stays clean — usually 18–24 inches off the floor works well. If roosts are lower than the boxes, hens will sleep in the boxes and make a mess.
Should I start with a kit or build completely from scratch?
Depends on your tools, time, and comfort with building. If you’re brand‑new to carpentry, a solid kit or set of detailed plans can save you a lot of head‑scratching. You can always add a custom run or extra features later. If you’re handy with a saw, scratch‑built gives you the freedom to size everything exactly for your yard and flock. I’ve done both, and there’s no shame in letting a good kit do the heavy lifting.