
Diy chicken coop
Diy Chicken Coop: build it, tweak it, or just skip the hard parts
I’ve raised laying hens for decades here in the States, through blizzards, heat waves, and more raccoons than I care to count. A diy chicken coop can be the best thing you ever build on your land—or the most frustrating project in the yard if you head in without a plan.
Let me walk you through what actually matters in a coop: how big, how safe, how easy to clean, and how to know when it’s smarter to start from a ready-made coop and just make it “yours.”
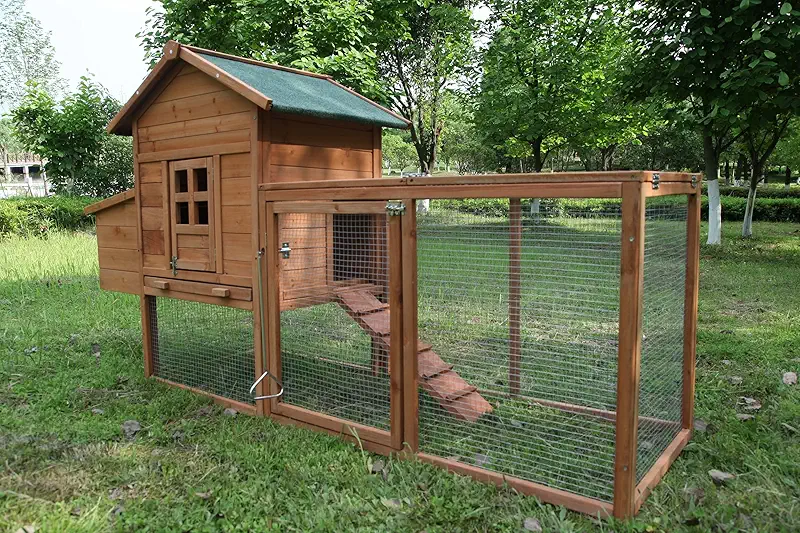
Why a diy chicken coop sounded like a good idea to me
When I built my first diy chicken coop, lumber was cheaper, my back was younger, and I was convinced I could outsmart every fox in the county with some scrap wood and stubbornness. I spent weekends measuring, sawing, and muttering under my breath while the hens watched from the garden like they were judging my work. The coop stood, the hens moved in, and I felt ten feet tall.
A year later, I found out what I got wrong. The roosts were too low, the ventilation was poor, and cleaning the thing felt like crawling into a wooden shoe box with a shovel. Every Saturday morning turned into a wrestling match between me, the muck, and a wheelbarrow that just wouldn’t cooperate.
Over time, I fixed it—raised the roosts, added vents up high, and cut a bigger clean-out door. I learned that a diy chicken coop isn’t about being fancy. It’s about making something that works every single day, when it’s muddy, when it’s freezing, and when you’re tired from everything else on the farm.
Before you pick up a hammer, walk through a “day in the life” of your hens—and you. Picture where you’ll grab eggs, where you’ll scrape manure, and how you’ll reach the waterer when there’s snow up to your knees. If it’s a pain to imagine, it’ll be worse in real life.
How big should a diy chicken coop be?
Folks always ask, “How many chickens can I fit in this coop?” My answer is usually, “Less than you think, unless you like drama.” Crowded hens squabble, peck, and stop laying. Happy hens have elbow room—well, wing room.
Basic sizing I use on my farm
- Inside coop space: about 4 square feet per hen for standard breeds.
- Run space: 8–10 square feet per hen is a good starting point.
- Nest boxes: 1 box for every 3–4 hens is usually enough.
- Roost space: 8–10 inches of perch per hen.
If you’ve got heavier breeds like Orpingtons or Brahmas, lean toward the bigger side. They’re like the couch potatoes of the chicken world: they move slower and take up a bit more room.
Planning for “chicken math”
There’s a condition we farmers joke about called “chicken math.” You start with six hens, and somehow by fall you’ve got twelve, and you swear you don’t know how it happened. So when you design your diy chicken coop, plan for more birds than you think you’ll keep.
I like to build at least 25–30% bigger than my current flock. It costs a bit more in lumber or materials now, but it’s cheaper than rebuilding or adding a second coop later.
Safety first: keeping your diy chicken coop predator-proof
I always say, “If you build a nice coop, word gets around the neighborhood.” Foxes, raccoons, coyotes, dogs, hawks—everybody gets interested. A good diy chicken coop keeps your hens in and everything else out.
Predators I’ve dealt with (more than once)
- Raccoons with clever little hands that open simple latches.
- Foxes that’ll dig like they’re paid by the hour.
- Neighborhood dogs that think your hens are squeaky toys.
- Hawks and owls watching from the tree line.
- Weasels that can squeeze through holes you’d swear are too small.
- Hardware cloth, not chicken wire. Chicken wire keeps chickens in; it does not keep predators out.
- Secure latches. Use two-step latches or carabiners that raccoons can’t easily open.
- Buried fencing. Bury hardware cloth 8–12 inches deep or bend it outward as an apron to stop digging.
- Solid doors and windows. Any opening big enough for a fist is big enough for trouble.
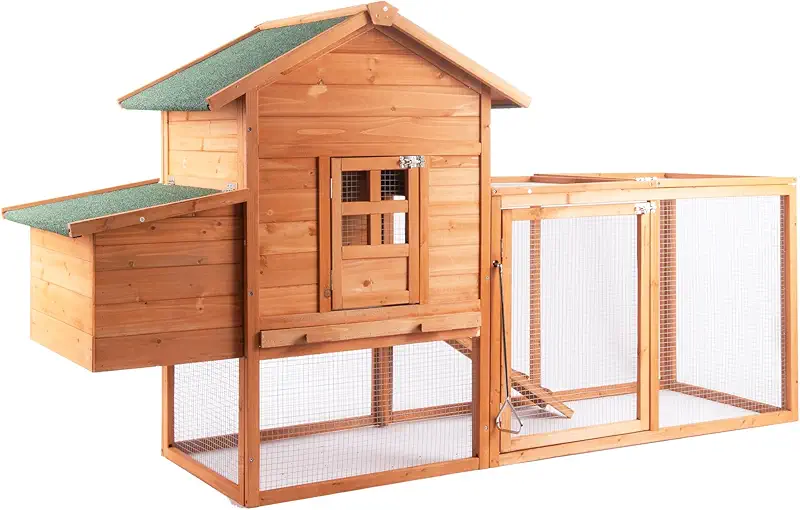
I lost my first hen, a little red named Rosie, to a raccoon because I trusted old chicken wire that was already on the property. That night taught me more than any book: if a predator can get in, sooner or later it will. From that day on, every diy chicken coop I’ve built has been wrapped tight with hardware cloth and strong latches.
Ventilation, shade, and weather: the quiet heroes of a diy chicken coop
People love to fuss about colors and cute trim on a diy chicken coop, but your hens care more about fresh air and staying dry. Chickens handle cold better than damp, and breeze better than stale air.
How I think about ventilation
- Openings high up under the eaves to let warm, moist air rise out.
- Cross-ventilation in hot climates, with the ability to close things up in winter.
- Vents covered in hardware cloth so nothing sneaks in while the air moves.
In winter, I keep drafts off the hens at roost level but still let air escape up top. Years ago, I sealed things up too tight, thinking I was keeping them warm. Ended up with frostbite on combs because the air got damp and cold. Learned my lesson the hard way.
Dealing with heat and cold
Out here, we see both—snow in January and blistering sun in July. My diy chicken coop designs changed because of it.
- In summer: I aim for shade, good airflow, and a light-colored roof so it doesn’t soak up heat like a cast-iron skillet.
- In winter: solid walls, deep bedding, and good ventilation up high. I use dry shavings, not straw, so moisture doesn’t linger.

We had a week of 100°F heat one year. The hens survived because the coop had big shaded openings and the run sat where the afternoon sun couldn’t hit them full force. A diy chicken coop that ignores the sun and wind will cost you in stress and eggs later on.
Layout that works: roosts, nest boxes, and doors in the right places
You don’t need a fancy blueprint for a diy chicken coop, but you do need a simple plan. Most of my coops share the same basic layout that I’ve refined over years of muddy boots and early egg checks.
Roosts
- Higher than the nest boxes so hens don’t sleep where they lay.
- 2x4 boards laid flat, not round dowels—gives their feet a good surface.
- Enough room so everyone can settle without piling on top of each other.
Nest boxes
- Dark and quiet, away from the main door and commotion.
- Easy to reach from outside if possible, so you’re not tromping through the whole coop twice a day.
- With a lip on the front to keep bedding and eggs from rolling out.
Doors and your daily routine
One of my early diy chicken coop mistakes was putting the main door on the wrong side of the building. Looked good on paper, but in winter I had to drag buckets up a slick hill just to open it. Not my brightest moment.
- Put human doors where they’re easy to reach in mud, snow, and rain.
- Keep the pop door (chicken door) leading straight into the run, not into your path.
- Give yourself a wide clean-out door so you can shovel and scoop without crawling.
Materials: build from scratch or start with a ready-made coop?
Full honesty: these days, I’m not as romantic about building everything from raw boards as I used to be. A diy chicken coop can mean cutting every stud by hand, or it can mean starting with a pre-built coop and customizing it to fit your land, your climate, and your hens.
When I let someone else do the hard part
A few years back, after one too many weekends eaten up by carpentry instead of farming, I started looking at ready-made coops. Some were flimsy, but some were solid starters that just needed a farmer’s touch—extra hardware cloth, bigger latches, maybe a better roof.
If you’re short on time, tools, or patience, there’s nothing wrong with treating “diy” as “do it your way”—which might mean picking a solid coop and then improving it where it counts.

What I look for in a starter coop
- A sturdy frame that doesn’t wobble when you push on it.
- Real wood or durable materials, not cardboard-thin panels.
- Room for upgrades: extra vents, stronger wire, better latches.
- Easy access for cleaning and egg collection.

Think of it like buying a used pickup. You want a solid engine and frame. Scratches you can deal with. With a diy chicken coop, structure and layout are your engine and frame. You can always change the trim, paint, and gadgets later.
Step-by-step: how I plan a diy chicken coop
Every coop I build or modify now follows a simple plan. You don’t need fancy software; a pencil, paper, and a bit of coffee will do the trick.
- List your reality, not your dreams. How many hens do you really plan to keep this year—and next year? What’s your weather like? How often can you clean?
- Pick your spot. Choose high ground if you can, with some natural shade and easy access to water and power if needed.
- Sketch the footprint. Draw a simple rectangle and mark where doors, windows, vents, and nest boxes will go.
- Plan the run. Your diy chicken coop isn’t just the house; the run is where your hens will spend most of their day.
- Decide: build or adapt. Choose whether you’ll cut boards yourself or start from a premade coop and customize it.
- Write down your must-haves. Predator-proofing, ventilation, cleaning access—put these in ink so you don’t “forget” them when you’re tired mid-project.

Once you’ve got those pieces down, the rest is just lumber, screws, and time. Or, if you’re like me these days, it’s a good ready-made coop plus an afternoon of upgrades with a drill and a strong cup of coffee.
Keeping hens happy in your diy chicken coop
A good coop is more than wood and wire. It’s part of how your hens feel every day. Happy hens lay better, stay healthier, and cause less trouble. Unhappy hens find ways to remind you—missing feathers, loud complaining, and egg strikes.
Egg laying and nest box habits
I’ve noticed hens prefer nest boxes that feel safe and a little hidden. I keep bedding clean, dim the light in that corner, and avoid slamming doors near the boxes. Once a hen trusts a nest, she tends to come back to it again and again.
If you find eggs on the floor, ask yourself:
- Are the nest boxes high enough from the ground?
- Are they too bright or right in the draft?
- Are the boxes crowded or dirty?
Boredom busters for the run
A diy chicken coop and run can feel like a playground or a prison, depending on what you put in it. When birds get bored, they peck each other, yell, and try to escape. Ask me how I know.
- Perches and stumps at different heights.
- Dust bath areas with dry dirt and wood ash.
- Scraps of cabbage or greens hung just out of reach.
- Logs or pallets to climb on and hide under.

On long winter days, I’ll toss a flake of hay in the run and scatter scratch through it. The hens go to work scratching and hunting like it’s their job, which, in a way, it is. A little thought in your diy chicken coop design keeps them busy and content.
Cleaning and maintenance: the part everyone forgets when dreaming up a diy chicken coop
It’s easy to fall in love with the idea of a cute coop. It’s harder to love shoveling manure out of tight corners. I design every diy chicken coop now with my future, tired self in mind—the one who has chores to do, daylight fading, and mud on his boots.
Make cleaning simple
- Big doors or removable panels for clean-out.
- Roosts that lift out or are easy to reach under.
- Flooring that doesn’t soak up moisture—solid wood you can cover with bedding works fine.
- Clear path from the coop to wherever you dump your bedding.
When you can clean fast, you’ll actually do it. When it’s a wrestling match, you’ll put it off. Your hens will tell you which side you chose by how the coop smells when you open the door.

Regular checks I do
- Walk the fence and hardware cloth for gaps or sagging.
- Check latches and hinges for wear.
- Look for damp corners or leaks after a big rain.
- Watch the hens—if they avoid a spot, something’s off.
A diy chicken coop isn’t a “build it and forget it” project. It’s more like a good pair of boots—you keep them clean, fix small things early, and they’ll serve you for years.
FAQ about diy chicken coop projects and laying hens
Sometimes, but not always. If you already have tools, leftover lumber, and a bit of experience, building from scratch can save money. If you have to buy everything—tools, hardware, paint, roofing—it can add up fast. I’ve seen folks spend more on a “budget diy” project than they would have on a good ready-made coop they could simply reinforce.
That’s why I often mix both worlds: start from a solid coop and put my effort into smart upgrades like better wire, stronger latches, and extra ventilation.
For a tiny backyard coop, I’d still stick to around 4 square feet of indoor space per hen and give them a decent run. A so-called “4–6 hen coop” on the box might be realistic for 3–4 hens if you want them truly comfortable. I’d rather have fewer birds that lay well than a packed coop of stressed hens.
In most U.S. climates, you don’t need electric heat if the coop is dry, draft-free at hen level, and has enough birds to share body warmth. I care more about blocking wind and keeping bedding dry. Insulation can help, but only if you also control moisture and provide solid ventilation up high.
I’ve seen more problems from damp, closed-up coops than from cold ones. Frostbite usually comes from moisture, not just low temperature.
My first “weekend” coop took three weekends and a few late evenings. If you’re organized, have a clear plan, and basic tools, a simple coop might come together in a couple of solid days. More complex designs can take a week or more of spare-time work.
If you’re short on time, starting from a ready-made coop and customizing it can turn that multi-week project into an afternoon of assembly and upgrades.
I check three things: structure, size, and upgradability. If the frame is solid, the size is honest (not wildly optimistic), and there’s room to add stronger wire, extra vents, and decent latches, then it’s worth considering. If it wobbles when you nudge it or looks like a strong wind could flip it, I move on.
When I’m browsing, I imagine where I’d add hardware cloth, how I’d access the inside, and how it will sit in my yard. If I can picture those upgrades clearly, it usually makes a good starting point for a diy chicken coop project.
If your hands are itching to get those hens settled and you’d rather spend time with the birds than with the lumber pile, you can start from a solid coop and still make it your own with the tips we’ve talked about.
Show me all coops