
Galvanised chicken coop
Galvanised Chicken Coop
I’ve raised laying hens on this old patch of dirt for more years than I care to count. I’ve tried wooden shacks, wire pens that rusted through, and more “clever” DIY ideas than my wife thought wise. After watching too many coops rot, warp, and fall apart, I came to appreciate a good, solid galvanised chicken coop. Let me walk you through what really matters when you’re choosing one for your hens.
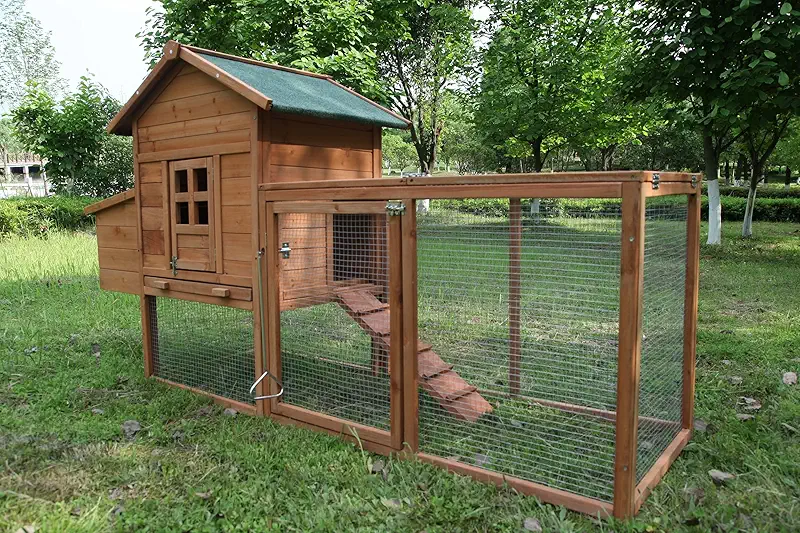
A galvanised chicken coop is more than shiny metal. It’s dry birds in a storm, quiet mornings without predator drama, and eggs that show up day after day. When the frame and wire are galvanised, they fight off rust, chewing, and weather a whole lot better than bare steel or old scrap wood.
- Resists rust and rot in wet, muddy runs
- Strong wire keeps dogs, raccoons, and coyotes frustrated
- Easy to hose down and keep clean
- Stays straighter and sturdier through seasons
Why a galvanised chicken coop keeps hens safer (and you saner)
Out here, our seasons don’t ask politely. Spring is mud, summer is hard sun, fall blows sideways rain, and winter just laughs at your plans. My first coops were mostly wood. They looked cute for about a year. Then the bottoms of the posts turned to sponge, the doors sagged, the hardware cloth rusted, and I spent more time fixing than farming.
When I switched to a galvanised chicken coop, the first thing I noticed was what I didn’t notice: less fuss, fewer patch jobs, and a whole lot fewer “Dad, the chickens are out again!” moments. The frame stayed square, the panels stayed tight, and the predators had to go pester someone else.
Galvanised steel is simply steel that’s been coated with zinc. That zinc layer is what stands between your coop and rust, especially where droppings, rain, and mud like to sit. On a farm, anything that doesn’t rot or rust fast earns my respect pretty quick.
Another thing I like is how easy these coops are to move and reconfigure. Many galvanised runs come in panel sections. You can stretch the run longer when you add birds, or pull it tighter in winter to keep everyone closer to the shelter. Try doing that with a heavy old wooden pen that already lost its square corners.
Key features to look for in a galvanised chicken coop
1. Strong galvanised wire and frame
Don’t let shiny metal fool you. Not all galvanised chicken coops are made equal. I always start by checking the wire gauge, the size of the openings, and how the wire is fastened to the frame. Thin wire and big holes are fine for keeping chickens in, but not for keeping teeth out.
- Wire size: Smaller openings (around 1 inch) are better for keeping out raccoon hands and weasels.
- Wire thickness: Heavier gauge is harder for dogs and coyotes to chew or bend.
- Fastening: Welded or tightly clamped connections are far better than a few loose ties.
I once cheaped out on a thin-wire pen. Took my neighbor’s dog about ten minutes to introduce himself to my hens. Nothing like feathers all over the yard to teach you about wire thickness.
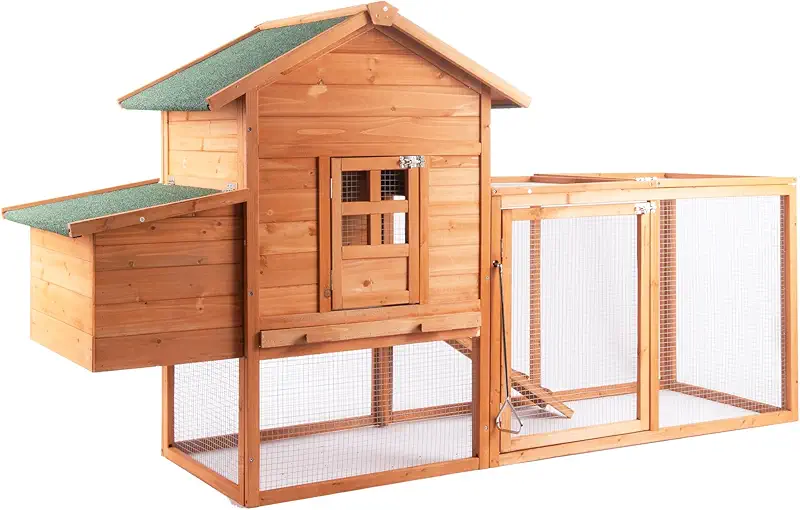
A sturdy galvanised frame and tight mesh go a long way in keeping your laying hens calm, safe, and productive.
2. Weather-ready roof and shade
Hens don’t ask for much, but they do ask for dry heads and a place to get out of the blazing sun. Many galvanised chicken coop kits include a roof panel or tarp. I like solid roof panels over at least part of the run so the birds have a permanent “dry zone” even in a downpour.
A sloped roof is worth its weight in eggs. Flat tops hold snow and water, and before long they bow or leak. A simple slope lets rain slide off and keeps the coop drier and cleaner.
3. Easy doors and human access
Whoever invented tiny doors clearly never tried to herd a squawking hen with a feed bucket in one hand. Look for a galvanised chicken coop with a door wide enough for you and a feeder, and tall enough that you don’t bang your head every morning. Trust me, by the third bump you’ll be saying words your pastor wouldn’t approve of.
I also watch how the latches are built. Raccoons are clever. If a child can open the latch easily, chances are a raccoon might, too. Double latches or carabiners give a little extra peace of mind.
Setting up your galvanised chicken coop for laying hens
A good coop is only half the story. Where you park it and how you set it up make a world of difference. I learned most of this the hard way, standing in ankle-deep mud and wondering why I hadn’t thought ahead.
Pick the right spot
If you can, put your galvanised chicken coop on slightly higher ground. Water should want to leave, not stick around and argue. Avoid the bottom of a slope where every storm dumps its load. Your boots and your birds will both be happier.
- Morning sun, afternoon shade: East-facing light helps hens wake up and lay, while afternoon shade keeps them cooler.
- Wind breaks: A hedge, barn wall, or fence on the windy side makes winter chores easier.
- Short walk: Place the coop where you won’t dread checking it in bad weather.
Flooring and bedding
Galvanised runs are often bare ground, which is fine if you manage it. I like to start with a base of coarse sand or small gravel near the entrance, then lay straw, wood shavings, or dried leaves in the main scratching area. That keeps their feet dry and droppings from turning into a swamp.
Inside the sheltered part of the coop, I use pine shavings on the floor and in the nest boxes. They stay drier, smell better, and are easy to rake out. Deep, dry bedding means less smell and fewer flies, and your hens don’t spend their lives standing in muck.

Position your galvanised coop on higher ground with a mix of dry bedding and scratch area so your hens stay busy and comfortable.
Perches and nest boxes that hens actually use
A galvanised chicken coop often gives you the frame and run, but you’ll still handle the roosts and nests. Hens like to sleep up off the ground. I aim for roosts about chest-high for me, so I can reach birds when I need to, but they still feel secure.
Use wood for the roosts, not bare metal. Metal gets cold and can chill their feet in winter. A simple 2x3 board with the wide side up works fine. And give about 8–10 inches of perch per bird so they’re not elbowing each other all night.
For nests, one box for every three or four hens is usually enough. They prefer a darker, quieter space with soft bedding. I like to mount them lower than the roosts so the birds don’t decide to sleep in the nest and poop where you expect eggs.

Add wooden perches and cozy nest boxes inside your galvanised setup to turn a sturdy frame into a true laying hen home.
My day-to-day routine with a galvanised chicken coop
Folks often ask how much work it really is to keep laying hens. With a decent galvanised chicken coop, the chores are pretty simple, and most of them smell like fresh air and coffee, not like a barnyard disaster.
Morning: quick checks and a hello
I start with water. Galvanised coops usually have a handy spot to hang a drinker off the frame. I dump, rinse, and refill every morning. Clean water means healthy birds, and it also means fewer odd health mysteries later on.
Next is feed. I keep feeders just high enough that the birds can reach, but they’re not raking their feet through the tray. Less waste, fewer freeloading wild birds. While I’m there, I take a slow look along the frame and wire for any gaps, chew marks, or loose spots.
Evening: lock up tight
Predators are like nosy neighbors; they mostly show up in the dark. Each evening I count heads on the roosts. Once you know your flock, you’ll spot who’s missing, limping, or not acting right. I secure every latch, especially the human door and any egg-access doors.
One habit that saves birds: walk the perimeter of your galvanised chicken coop every few days. I’ve caught digging at one back corner and a bent section of wire behind the compost pile this way. Predators usually test first, then come back harder.

Regular walk-arounds catch small problems early: loose wire, digging, or sagging panels before they cost you birds.
Weekly and monthly care
Once a week I rake out the worst of the droppings under the roosts and top up bedding in nests. With a galvanised frame and panels, I’m not worried about the structure soaking up moisture, but I still want the birds on clean, dry footing.
Every month or so, I pull the feeders and drinkers and give them a good scrub with hot soapy water. While they’re drying, I often hose down the wire panels of the coop. Galvanised surfaces clean up nicely, and a quick spray knocks down dust, cobwebs, and dried muck.
When you keep up with small chores, you rarely face big messes. That’s true for life and coops, far as I can tell.
Keeping your flock healthy in a galvanised coop
A safe coop is the first step, but a healthy flock takes a little more attention. Over the years I’ve learned to read my hens like my neighbors read baseball box scores.
Ventilation without drafts
Galvanised chicken coops often have good open sides with wire for airflow. That’s great, but hens don’t do well in cold, direct drafts at roost level. I like solid panels or tarp on the windward side and more open on the leeward side. Think “breeze over their heads, not under their feathers.”
In summer, I’ll sometimes hang shade cloth on the sunniest side. In winter, I’ll add removable panels or plastic sheeting, leaving gaps up high so moisture can escape. Damp, still air is harder on birds than cold, dry air.
Cleanliness and pests
One blessing of a galvanised chicken coop is how easy it is to keep cleaner than old wood. Mites and lice like cracks and rough boards more than smooth metal and mesh. Still, they’ll move in if you give them the chance.
I sprinkle a little fine sand or dusting powder in favorite dust-bath spots and check under feathers of a few birds every month. If you see crawling specks at the base of feathers or around the vent, it’s time for a clean-out and treatment. Catch it early and it’s a small job.

Good airflow, dry bedding, and simple routines keep a galvanised coop sweet-smelling and your hens in laying shape.
Feed, water, and egg production
Healthy hens in a good coop pay their rent in eggs. If I see egg numbers drop, I ask a few questions:
- Are they getting a complete layer ration and enough of it?
- Is clean water always available, even on freezing days?
- Has anything changed in the coop—new birds, new lights, or different roosts?
- Are predators bothering them at night, even if they’re not getting in?
A galvanised chicken coop helps with some of this. It’s easier to hang feeders, mount water systems, and string a simple light if needed. The more stable and calm the coop, the steadier your egg basket.
Choosing the right size galvanised chicken coop for your flock
Folks new to chickens almost always underestimate how much space a bird needs. Then they call me asking why their hens are pecking each other bare. Space, boredom, and stress go hand in hand.
How much room per hen?
For laying hens, I aim for at least 3–4 square feet per bird inside the shelter and 8–10 square feet per bird in the run, more if I can spare it. A galvanised chicken coop with a roomy run lets your hens scratch, dust-bathe, and wander a bit without turning the place into a prison yard.
If you’re tight on space, go a little smaller on flock size rather than cramming more birds into a small pen. A few calm, steady layers will give you more eggs and fewer headaches than an overcrowded flock.
Building in room to grow
I’ve never met a chicken keeper who stopped at their first number. You start with six, then a neighbor offers you a couple of pretty pullets, and before long you’re “accidentally” at twelve. A galvanised coop with panel sections makes it easier to expand later.

Plan space for the flock you have and the birds you’ll “accidentally” add later; panel-based galvanised runs expand without much fuss.
Thinking ahead about chores
When you look at a galvanised chicken coop, imagine cleaning it in February with a cold wind blowing. Can you reach every corner? Can you drag a rake through the run? Is the door wide enough for a wheelbarrow? Make the daily work easy, and you’ll take better care of your birds.

Picture yourself doing winter chores in this setup—easy access and solid footing keep hens and humans happier.
FAQ about galvanised chicken coops
If you’re ready to give your hens a safer, steadier home, a good galvanised chicken coop is a fine place to start. Take your time, picture your daily chores, and choose the setup that fits your land and your birds.
Show me all coops