
Low cost diy chicken coop
Low Cost Diy Chicken Coop
I'm a gray‑bearded farmer from the Midwest, and I've built more chicken coops than I care to admit. Some turned out sturdy and smart. A few… well, the wind liked them more than the hens did.
In this guide I’ll walk you through how to put together a low cost DIY chicken coop that keeps your girls safe, dry, and laying steady, without emptying your wallet. No fancy talk, just what has actually worked on my farm and on neighbors’ homesteads over the years.
If you’d rather start with something ready-made and tweak it instead of building every board from scratch, there are plenty of solid options that can save you time and mistakes. I’ll share how I mix DIY and store‑bought pieces, so your coop ends up strong, simple, and easy to care for.
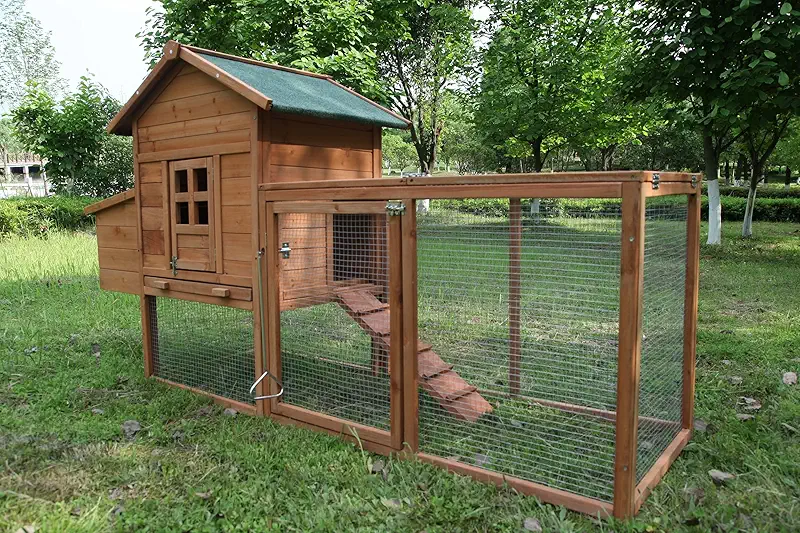
What “low cost diy chicken coop” really means on a farm
When folks say they want a low cost DIY chicken coop, I always ask two questions first: how long do you want it to last, and how much time do you have? Money is only one part of the story. I’ve seen cheap coops cost more in the long run than sturdy ones, because people had to rebuild after one bad storm or one hungry raccoon.
To me, “low cost” means this: you spend as little as you can on things that don’t matter much to a chicken, and you never cut corners on the things that keep them alive and laying. That balance is where the real savings sit.
Where you can save money (and where you shouldn't)
- Save on decorative siding: use reclaimed boards, old barn tin, or off‑cut lumber.
- Save on roof color and style: plain metal or shingles work fine; hens don’t judge.
- Save on fancy windows: simple openings covered with hardware cloth are plenty.
- Save on interior paint: only seal what needs cleaning; the rest can stay bare.
- Don’t skimp on predator-proof wire: use hardware cloth, not flimsy chicken wire.
- Don’t skimp on roof and floor strength: rot and leaks are egg‑killers.
- Don’t skimp on locks and latches: raccoons are smarter than some politicians.
- Don’t skimp on ventilation: dry air keeps birds healthy and combs bright red.
Planning your coop: size, spot, and simple layout
Before you pick up a hammer, grab a pencil. A half hour of planning has saved me whole weekends of cussing over the years. Let’s talk about how big your coop should be, where to put it, and what needs to fit inside.
How much space do laying hens actually need?
For a low cost DIY chicken coop, you don’t have to build a palace, but you also don’t want the birds packed like commuters on a Monday train. Crowded hens pick feathers, spread disease faster, and stop laying when stressed.
- Inside the coop: aim for about 3–4 square feet per hen.
- Outside run: around 8–10 square feet per hen is comfortable.
- Roost space: about 8–10 inches of roost bar per hen.
- Nesting boxes: roughly one box for every 3–4 hens.
If you’re like most folks, you’ll start with a small flock and then “somehow” end up with more. Happens to all of us. I always suggest planning the coop for at least twice the number of hens you think you’ll keep. Chickens are like potato chips: nobody stops at one.
Finding the best spot in your yard
I’ve moved coops more times than I can count, usually because I didn’t think ahead about shade, mud, or neighbors. Here’s what I look for now:
- High and dry ground so rain doesn’t pool under the coop.
- Some shade, especially in hot summers, but with enough sun to dry the run.
- Easy access so you’re not wading through snow or mud to collect eggs.
- Room for the run and maybe a future expansion when “just six hens” becomes twelve.
- Safe distance from noisy roads or overly curious dogs.
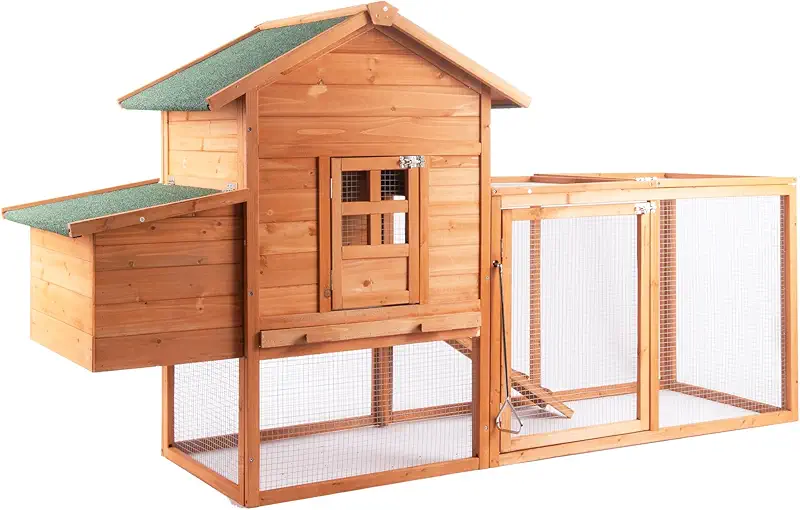
Simple layout that keeps chores easy
I build every coop with future me in mind. Future me is usually tired, wearing one boot, and holding a feed bucket. So the layout has to make chores simple:
- Big, human-sized door so you can step in and clean, not crawl like a raccoon.
- Egg boxes with outside access so kids or grandkids can help collect without stepping in poop.
- Feed and water near the door to save you steps every morning.
- Roosts higher than nest boxes, so birds sleep on the roosts, not in the egg boxes.
- Plenty of vents up high to let moisture out while keeping birds out of the draft.
Using reclaimed and low-cost materials the smart way
A low cost DIY chicken coop almost always starts with what you already have around. On my place, that’s usually a pile of “might‑use-it-someday” lumber that’s older than my truck. Used right, that old wood can save a lot of money. Used wrong, it turns into a soggy mess in a couple of seasons.
Where reclaimed wood works well
I like to use reclaimed boards and pallets for parts that don’t carry much weight and won’t sit in standing water:
- Interior walls and partitions to block drafts and hanging feeders.
- Exterior siding above ground level.
- Nesting boxes and dividers.
- Short support braces and trim pieces.

Where I still spend real money
There are three places I’ve learned never to go cheap: predators, rot, and water. That means I still open my wallet for:
- Hardware cloth (not chicken wire) around the run and vents.
- Treated or rot-resistant lumber for the base and any part that touches the ground.
- Solid roofing that sheds rain and snow without sagging.
- Sturdy hinges and latches that can’t be popped open by a raccoon or a curious kid.
When a ready-made frame actually saves you money
Some of the best “DIY” coops I’ve built in the last decade started with a store-bought frame or small coop and then I added my own run, extra roof, or stronger wire. You save time on the fiddly angles and doors, and you still get to adjust things to your land and flock.
For folks without many tools, starting with a simple base coop or run panel set can actually cost less than buying all the lumber and hardware loose, especially if you count your time and the trips to the store when you forget something.
Step-by-step: building a simple low cost DIY chicken coop
Let me walk you through the basic build I’ve used for years. I’ve changed little details, but the bones stay the same: raised floor, solid roof, good airflow, and an attached run.
1. Start with a raised base
I like my coop floor at least a foot off the ground. That keeps it dry, gives shade underneath, and makes cleaning easier on old knees.
- Set concrete blocks or heavy pavers at the corners to keep the wood off soil.
- Build a simple rectangular frame out of 2x4 or 2x6 boards.
- Make sure it’s square and level; everything else depends on this.
- Attach plywood or deck boards for the floor; seal the top with a pet-safe sealer or heavy paint if you have it.

2. Frame the walls and roof
Next comes the skeleton. Don’t overthink it; hens are light. Build it strong enough for storms and snow, not for a herd of cattle.
- Use 2x3 or 2x4 studs for the corners and door frame.
- Plan for a full-height human door on the front or side.
- Leave spaces up near the roof for vents covered in hardware cloth.
- Give the roof a good slope so rain and snow slide right off.
3. Add siding, doors, and vents
Here’s where your reclaimed wood can shine. I’ve used everything from barn boards to leftover fence panels.
- Cover the walls with whatever sound boards you have, starting from the bottom up.
- Build a solid door that fits snug and closes easily, even with gloves on.
- Cut out vents up high and cover them from the outside with hardware cloth, not chicken wire.
- Make a pop door (small chicken door) between coop and run; a simple sliding or hinged panel works fine.
4. Put on the roof
Roofing is one place I like to keep it boring. A plain metal panel or asphalt shingles is perfectly fine. What matters is no leaks.
- Lay down roofing felt if you have it, especially under shingles.
- Overlap metal panels so water always runs over, not under, the seams.
- Make sure the front edge has a little overhang to protect the door from rain.

5. Build the run like a fortress
If you’ve got hawks, raccoons, opossums, coyotes, or neighborhood dogs, this is where the real battle is. A cheap run is just a snack bar for predators.
- Set sturdy posts or use a pre-made run frame you can bolt together.
- Wrap everything with hardware cloth buried at least 12 inches deep or bent outward at the bottom.
- Cover the top with hardware cloth or strong netting to keep hawks out.
- Add a people door with a grade-A latch, not a wimpy hook.
Inside the coop: nests, roosts, bedding, and feed
Once the shell is up, it’s time to make the inside comfortable. Chickens don’t need much, but the details matter more than the decorations.
Cozy nesting boxes that hens actually use
I like my nesting boxes about 18 inches off the floor, in the darker part of the coop. Hens prefer low, quiet corners where they feel hidden from the world.
- Make each box about 12 x 12 x 12 inches.
- Add a little lip on the front to keep bedding and eggs from rolling out.
- Line with straw, wood shavings, or even old hay, and top up as needed.
- If you can, give yourself outside access to the boxes for easy egg collecting.

Roosts and night-time comfort
At night, hens want to get up off the floor together. I use 2x3 or 2x4 boards turned wide side up so their feet stay flat and warm in winter.
- Place roosts higher than the nest boxes, or they’ll sleep where the eggs should be.
- Leave at least 12 inches above the roost so they don’t bump their heads.
- Allow at least 8–10 inches of bar per hen, more if your flock is big-bodied.
Bedding and cleaning that won’t break your back
On my farm, I use what’s cheap and handy: usually pine shavings, sometimes straw. The key is to keep it dry and fluffy. Wet bedding is worse for hens than cold weather most days.
- Spread a good layer of bedding over the floor and in nest boxes.
- Stir or top up weekly; clean out fully every month or so, more in wet seasons.
- Keep a wide scoop shovel or rake nearby to make cleaning quick.

Feed, water, and daily chores
I hang my feeder just high enough that hens have to stretch a little. That keeps them from scratching feed all over the floor. Waterers get the same treatment: up off the ground, but low enough for the smallest hen.
Keep both near the door so your chores take minutes, not half the morning. The best coop is one you still enjoy tending in February when the wind cuts through your coat.
Balancing DIY pride with off-the-shelf help
I’m as stubborn as any old farmer, and I love building things from scratch. But over the years I’ve learned that there are times when grabbing a ready-made coop or run section actually makes more sense, especially for folks just starting out.
Some of my neighbors start with a small store-bought coop, then we work together to:
- Swap the thin wire for hardware cloth on all sides and vents.
- Add a bigger run with simple posts and panels.
- Raise the whole thing on blocks to keep floors from rotting.
- Extend the roof line with a bit of extra metal or plywood.

That mix of DIY and pre-made parts often gives you the best of both worlds: less time wrestling with angles and more time enjoying fresh eggs and a quiet cluck in the yard.
FAQ about building a low cost DIY chicken coop
For a small backyard setup, I like to see at least 3–4 square feet inside per hen and 8–10 square feet in the run. So a coop that’s 4x6 feet inside (24 square feet) is comfortable for about 6 hens, as long as they have a decent run.
You can squeeze more in, but you’ll pay for it with pecking, stress, and fewer eggs. Hens are like family at Thanksgiving: everyone gets along better when there’s room to move.
You can, but you need to be picky about where you use them. Pallets and scrap boards are fine for walls, nest boxes, and trim. For anything that touches the ground, holds up the roof, or keeps predators out, I stick to strong, treated or rot-resistant lumber and good hardware.
Think of pallets as your “nice to have” savings, not your whole foundation. Hens forgive ugly boards; they don’t forgive weak frames and holes in the wire.
No, and I wish someone had told me that when I was young. Chicken wire keeps chickens in, but it doesn’t keep predators out. Raccoons, dogs, and even big rats can tear through it or bend it.
For a truly safe low cost DIY chicken coop, I use hardware cloth (usually 1/2 inch) around the run, over vents, and along any weak spots. You can still use chicken wire on the very outside if you already have some, but the real strength needs to come from hardware cloth.
Ventilation is more important than insulation for most backyard coops. Chickens make a lot of moisture when they breathe and poop. If that moisture stays trapped, it chills them in winter and causes frostbite and respiratory problems.
I always say: more vents up high, fewer drafts down low. Let the damp air rise and escape near the roof while the birds stay out of the breeze. A dry coop with moving air beats a sealed-up box every time, even on cold nights.
If tools aren’t your close friends yet, I’d start with a small ready-made coop or run frame and then focus your DIY energy on improving it—stronger wire, bigger run, better roof overhang, maybe raising it on blocks.
That way you still get the satisfaction of creating a safe, custom home for your hens, but you’re not stuck figuring out every angle from scratch. Over time, as you gain confidence, you can add more features or even build the next one fully by hand.
Closing thoughts from an old farmyard
I’ve built coops that looked sharp enough for a magazine, and I’ve built coops that leaned like a tired mule but kept every hen safe and dry. The birds didn’t lay any better in the pretty ones. What mattered most was solid basics: dry floor, tight roof, tough wire, good air, and a run big enough to stretch their wings a bit.
Your low cost DIY chicken coop doesn’t have to impress the neighbors. It just has to make sense for your land, your weather, and your flock. Start simple, build safe, and don’t be afraid to let a ready-made piece or two do the hard work while you learn.
And remember: every farm old-timer you meet has at least one coop story they’re a little embarrassed about. The trick is to make yours cheap mistakes instead of expensive ones.