
Roosting bars for chicken coop
Roosting Bars For Chicken Coop: Simple Setups That Keep Hens Happy
I’ve been tucking hens in at night for more than three decades, and I can tell you this: a good roosting bar makes hens calmer, coops cleaner, and mornings a whole lot easier. Let me walk you through what really works out here in the yard, not just on paper.
When your roosting bars are the right height, width, and distance apart, your girls sleep better, lay better, and argue less. It’s one of those small details that changes the whole coop.
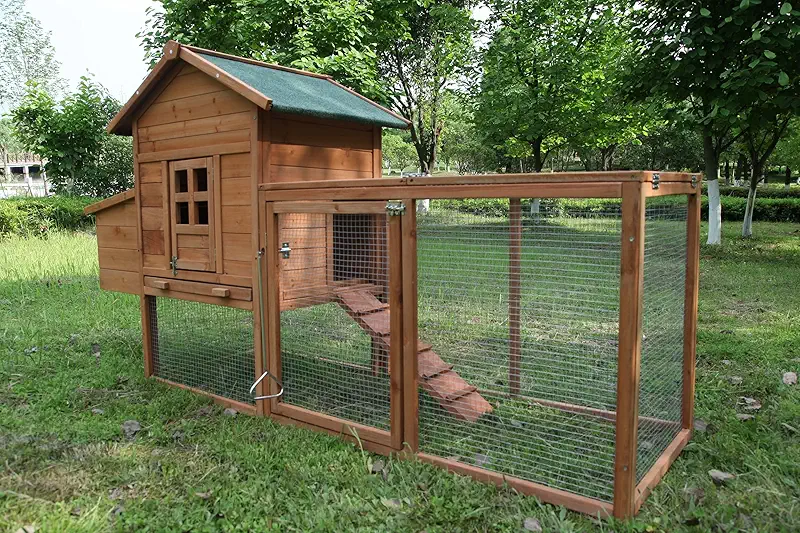
If you want to see some ready-to-use roosts and coop setups, have a look here:
Let me browseWhy roosting bars matter more than most folks think
Out here on the farm, I’ve seen just about every wrong way to set up roosting bars for chicken coop use. I’ve seen skinny broomsticks, slick metal pipes, and roosts higher than my shoulder. I’ve also seen the trouble that comes with them: crooked toes, frostbitten feet, bullying hens, and a whole lot of mess in the wrong places.
Chickens are jungle birds at heart. At night, they want to get up off the ground where they feel safer. When you give them solid, comfortable roosts, they settle down faster, burn less energy, and keep more strength for laying eggs and scratching around the next day.
On my place, the calmest flock I ever had was a group of 18 mixed hens who all slept on three sturdy wooden bars. Same feed, same coop size as other years — the only big change was better roosts. Fights dropped, feather picking eased up, and egg numbers went up a bit too. That told me plenty.
The right size for roosting bars (from a hen’s point of view)
When you’re thinking about roosting bars for chicken coop comfort, imagine your hen’s feet at night. She wants to sit so her toes wrap just enough around the bar, and when it’s cold, she can tuck her toes under her belly and feathers.
Width and shape that really work
- 2–4 inches wide works best for standard breeds.
- Flat on top with slightly rounded edges is ideal.
- A 2×4 board laid flat, wide side up, is one of my old standbys.
Do not use thin round rods, metal pipes, or anything slick. I tried a metal conduit once, just to see. They used it the first night, then half the flock chose the nest boxes instead. That told me all I needed to know.
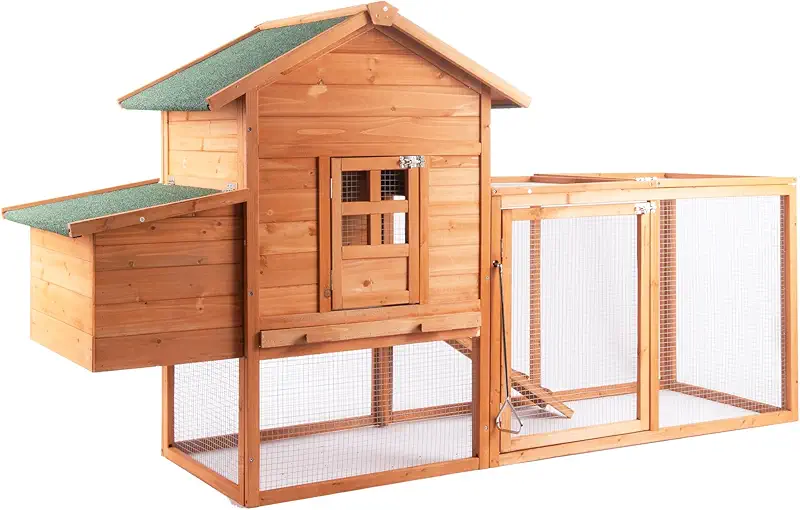
How much space per hen?
I keep it simple with this rule for my layers:
- 8–10 inches of bar space per hen for standard breeds.
- 10–12 inches if you’ve got big fluffy birds like Orpingtons or Brahmas.
- Add a little extra room for summer so they don’t have to pack tight in the heat.
A lot of folks think, “They all squish up anyway, I can get away with less.” Sure, they can squish — but when a bully hen wants to shove someone off the bar, you’ll hear about it. And you’ll find droppings where you don’t want them.
Best height and placement for roosting bars
With roosting bars for chicken coop setups, height is where many people go wrong. Too low, and the floor gets dirty and cramped. Too high, and older or heavier hens can hurt their legs jumping down.
Good height ranges
- Beginners / heavy breeds: 18–24 inches off the coop floor.
- Active lighter breeds: 24–36 inches works well.
- Multiple levels: Space each level 12–18 inches higher than the last.
My older Barred Rock girls prefer the lower bar, while the younger flock heads straight for the highest. That natural sorting helps keep the peace at bedtime.
Keep roosts higher than nest boxes
Here’s one lesson I learned the hard way: always keep your roosting bars higher than the nest boxes. Chickens will sleep in the highest comfortable spot. If that spot is the nest box, you’ll wake up to poopy eggs and cranky hens.
Once I lowered roosts below the nests by mistake during a remodel, and in two nights I had to clean every nest box. I fixed it quick, raised the roosts, and the hens got the message.

Distance from wall and between bars
- At least 10–12 inches from the wall so tails and feathers don’t brush.
- 12–16 inches between bars so they don’t poop on the row below.
- Keep a clear landing zone on the floor where they jump down in the morning.
Wood, metal, or plastic? Choosing roosting bar material
Over the years, I’ve tried all kinds of roosting bars for chicken coop setups. I always keep coming back to plain old wood, for a few good reasons.
| Material | Pros | Cons |
|---|---|---|
| Wood (2×4 or similar) | Warm, easy to grip, easy to work, inexpensive | Needs cleaning and may need replacing after years |
| Metal pipe | Very durable, easy to wipe | Cold in winter, slippery, bad for feet in cold climates |
| Plastic roost systems | Often modular, easy to clean, some are well-shaped | Can flex, may be slick if not textured, cost more |
If you live where winters bite hard, stay away from bare metal. I had one year where combs and feet took a beating just because the birds roosted on a cold, thin pipe. I wrapped it with wood that same week and never made that mistake again.

These days, I call wood my “forgiving” material. If a bar is a hair too wide or narrow, the hens still manage fine. If you decide to look at some ready-made wooden roost systems, there are quite a few well-designed options out there.
How to install roosting bars the easy, sturdy way
I like simple builds that don’t wobble. Hens do not care how fancy it looks, but they do care if it feels steady under their feet.
Basic setup steps I use
- Plan your layout on paper first: number of birds, bar length, and height.
- Use solid supports on both ends — 2×4 cleats or side brackets on the coop wall.
- Screw bars into the supports, not just nails. Screws hold up to flapping birds.
- Test with your own weight by pushing down with both hands before letting the flock on.
- Make them removable if you can, so cleaning the coop floor is easier.
One winter, I got fancy and made a folding roost system. Worked great, until I forgot to latch it and the whole thing collapsed like a bad card trick when the girls hopped up. Nobody hurt, but I rebuilt it with plain solid brackets the next day. Simple usually wins.

Keeping roosting bars clean and mite-free
When folks ask me about roosting bars for chicken coop maintenance, I always say: “Where they sleep is where the mess piles up.” A little routine care keeps smells down and birds healthy.
My cleaning rhythm
- Weekly: Scrape droppings off bars with a flat scraper or old putty knife.
- Monthly: Wipe bars with warm soapy water, let them dry in fresh air.
- Seasonally: Dust or spray for mites under the bars and on wall joints.
I also like to use a removable poop board under the roosts. It catches most of the mess and makes cleaning quicker. My back thanks me every time.

Roost setups for different flock sizes
Every coop is a puzzle. But the basics of roosting bars for chicken coop planning don’t change much whether you’ve got 4 hens or 40.
Small backyard flock (4–8 hens)
- One bar, about 4–6 feet long.
- Height around 18–24 inches.
- Keep it simple and easy to remove for cleaning.
Medium flock (8–15 hens)
- Two bars, parallel, 5–6 feet long each.
- Stagger heights by 12–16 inches, higher row at the back.
- Leave a clear walkway for you to get in and out of the coop.
Larger flocks (16+ hens)
- Three or more bars, or L-shaped layouts inside bigger coops.
- Keep far enough apart so nobody is roosting directly under another bird.
- Consider modular roosting systems you can extend as the flock grows.

A few personal tricks to keep bedtime peaceful
Over the years, I’ve picked up a handful of little habits that make my roosting bars for chicken coop setups work even smoother.
- Same bedtime routine: I close the run door and say the same phrase every night. Sounds silly, but the hens know it means “time to settle.”
- Gentle introductions: When adding new birds, I pop them on the lower bar after dark the first couple of nights. They wake up like they’ve always belonged.
- Bullying check: I peek in 30 minutes after dark. If one hen is always down on the floor, I watch for bullies and sometimes reshuffle roost positions.
- Winter adjustments: On the coldest weeks, I block drafts right at roost height, not just down at the floor. Warm bodies, dry air, and no strong breeze — that’s the goal.

And if you’re wondering, yes, I do talk to my hens when I close up the coop. They don’t always listen, but they never interrupt, which is more than I can say for some people.
FAQ: Roosting bars for chicken coop
1. How high should roosting bars be in my chicken coop?
For most backyard flocks, 18–24 inches off the floor is a safe range, especially for heavier breeds. Lighter birds can handle 24–36 inches just fine. The key is to keep roosts higher than the nest boxes, but not so high that older or heavy hens bang their legs when they hop down in the morning.
2. What size and shape is best for roosting bars?
A wooden board 2–4 inches wide, flat on top with rounded edges, is about perfect for most laying hens. A 2×4 laid flat is my favorite. Thin round dowels or metal pipes are too hard on their feet and can cause problems, especially in cold weather.
3. How much roosting space does each hen need?
Plan on 8–10 inches of roost length per standard hen and 10–12 inches for bigger, heavier breeds. They will crowd together in winter to keep warm, but giving them enough room helps reduce fighting and keeps the nighttime drama down.
4. Can I use metal or plastic for roosting bars?
You can, but choose carefully. Bare metal is cold and slippery, so I avoid it, especially in cold climates. Some plastic roost systems are shaped well and easy to clean, which can be handy. I still prefer wood for its warmth, grip, and the way birds naturally take to it.
5. How do I keep roosting bars clean and free of mites?
Scrape droppings off weekly, give bars a soapy wipe now and then, and check for mites at night with a flashlight. Treat cracks, bar ends, and wall joints if you see any signs. A removable poop board under the roosts makes cleanup simpler and keeps the coop smelling much better.
If you’re like me, you probably enjoy building things from scrap wood — but sometimes it’s nice to see ready-made coops and roosting setups and borrow a few ideas.
Take your time, picture what will make your hens most comfortable, and then look at a few options until something just feels right.
Show me more coops